In my previous article Custom Content Types in SharePoint, I demonstrated how we can create custom content types in SharePoint. However we left one piece open where we couldn’t see the data that was entered in the list through the default content type. We had to go to List->Edit Properties to edit/update or view the values. In this article we’ll see how we can define custom page layouts for Custom Content Types in SharePoint. We will quickly recap the creation of a new Content Type. This time we’ll use a Publishing Content Type as the parent type and the site will be using a ‘Publishing’ site template.
Creating a Custom Publishing Content Type
This is quick recap of my previous article with one change as detailed below
1. Follow steps 1-4
2. In Step 5 where we’ve to make sure of the following under “Parent Content Type:”
a. “Select Parent content type from:” is set to ‘Publishing Content Type’
b. “Parent Content Type:” is set to ‘Page’
These two settings are important else you won’t be able to use the content type in a custom the page layout (created through SharePoint Designer).
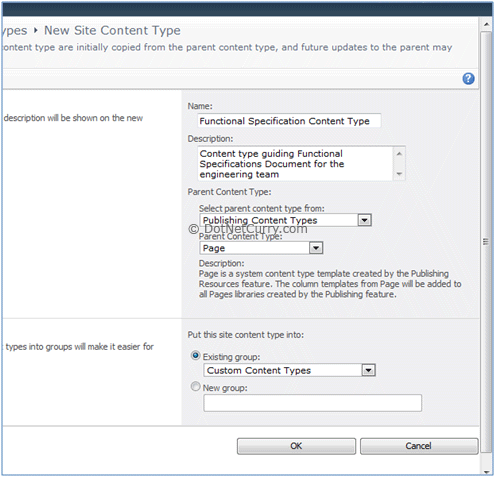
Click OK and add the required columns to the content type as defined in Step 6 in my previous article.
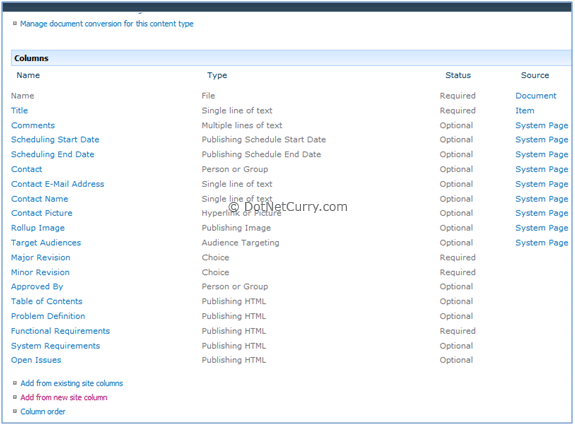
You will notice a few extra columns in the default content type this time, because our content type is inheriting from “Page” Content Type. You can keep them because they are optional. Best part about the custom page layout is you can choose to show/hide the fields you want for the document.
Once we are done adding columns for our ‘Functional Specification’ the list of columns should look something like the list below.
Note: It’s important for the parent site to use a Publishing Site template. Else custom page layouts cannot be created through designer.
Creating Custom Page Layout
To create a custom page layout we’ll use SharePoint Designer. It’s a freely downloadable tool from Microsoft. You can download the 32 bit version or the 64 bit version
Step 1: Start SharePoint Designer.
Step 2: Select ‘Sites’ and click on ‘Open Site’.
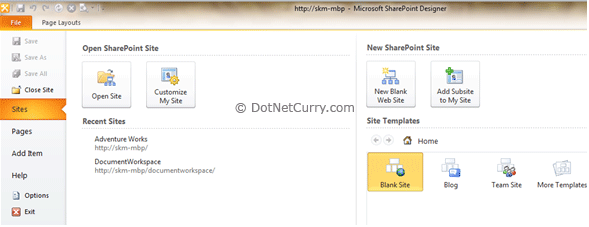
Step 3: Give the site name and click Open. You’ll be prompted for credentials. Provide credentials of a site collection admin user.
Step 4: Under ‘Site Objects’ in the left navigation pane, select ‘Page Layouts’
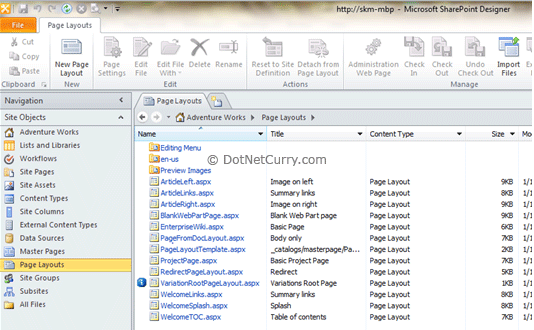
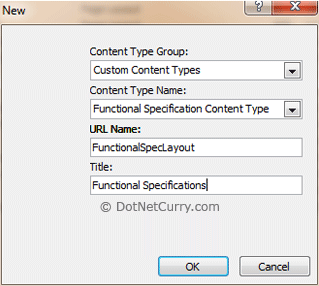
Step 5: Click on ‘New Page Layout’ button in the ‘Page Layouts’ ribbon. You will get a dialog asking you to select the content type. Here we will select the custom content type we created. Provide a filename in the URL Name field and a page title in the Title field. Click OK to continue.
Step 6: In a few seconds, the skeleton layout page (aspx) will be created and opened in SPD. It’s a standard ASPX page. If you are not too much into web development, just consider it as a well formed xml. All you care about is putting your content in <asp:Content …></asp:Content> tags.
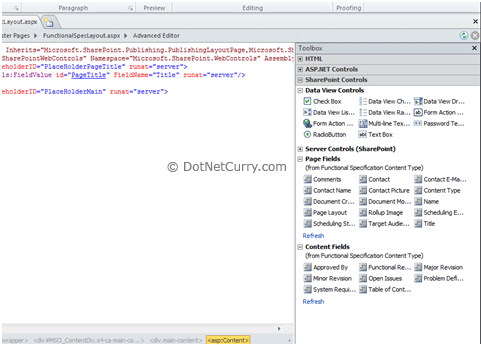
The thing of most interest for us is the Toolbox on the right. Expand the SharePoint Controls pane and you’ll see ‘Page Fields’ and ‘Content Fields’ section. Here you’ll see the Content Type columns we had defined have been all pulled in.
Step 7: Drag and Drop all the fields you need on the ASPX page inside the <asp:Content></asp:Content> tags. Unlike me if you are an HTML/CSS guru, here is where you get creative. In the end, the page should have all the content type fields you need and at a very minimum it will be good to include all the mandatory ones. My best effort looks as follows:
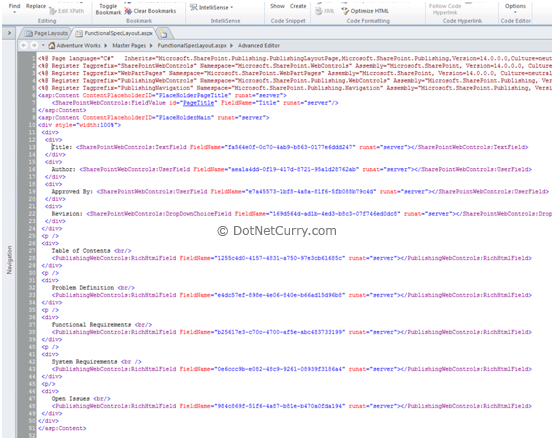
Note: Observe when you drop the fields you have GUID only for the FieldName, so you better label them either before or immediately after you’ve dropped the field, else you’ll forget which field you dropped.
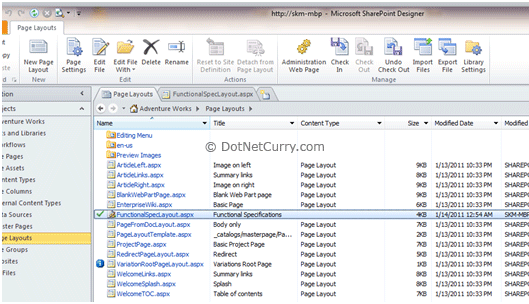
Step 8: Save the page (trusty old Ctrl+S) and switch to the ‘Page Layouts’ tab. Here you’ll see the ‘FunctionalSpectLayout.aspx’ has a checkmark against its name.
Step 9: Right click on ‘FunctionalSpecLayout.aspx’ and select ‘Check In’. You will be prompted with a dialog as follows:
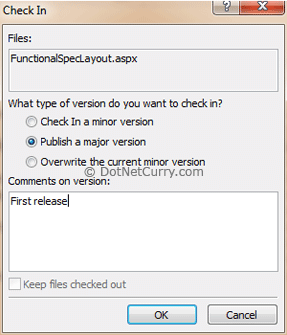
Make sure you select ‘Publish a major version’ because this is our first publish. Click OK.
Step 10: Clicking on OK will give you the following prompt
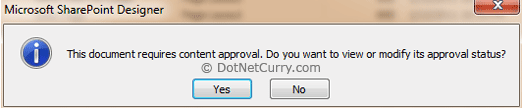
Click on ‘Yes’ and wait for SPD to start your default browser. If asked for credentials provide credentials for a Site Collection Admin. A page similar to the following will open up.
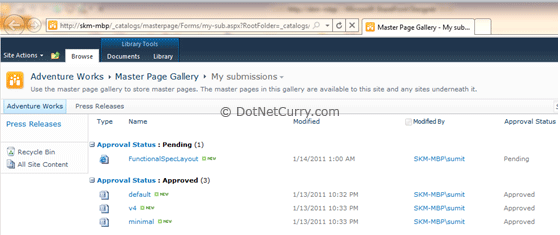
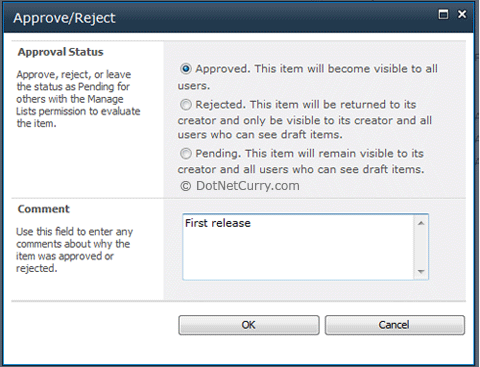
Step 10: Pull down the menu for the ‘FunctionalSpecLayout.aspx’ by click on the down arrow. Select ‘Approve/Reject’ from the menu.
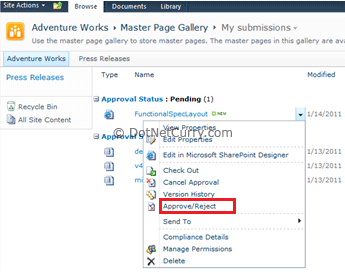
Step 11: It will pop-up a window with the following options. Select Approved, provide comments and hit OK.
Our Custom layout is all but done. Now, let us test it out.
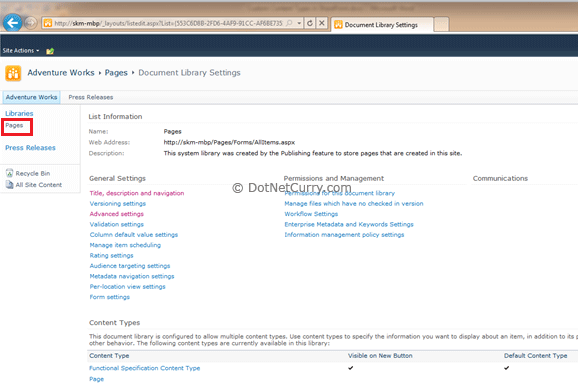
Step 12: Select ‘Site Actions’ > ’Site Settings’. Under ‘Site Administration’ select ‘Site Libraries and Lists’. Click on ‘Customize “Pages”’ link. It will take us to the Page Library settings (shown below) where we’ll add our content type as one of the supported content types.
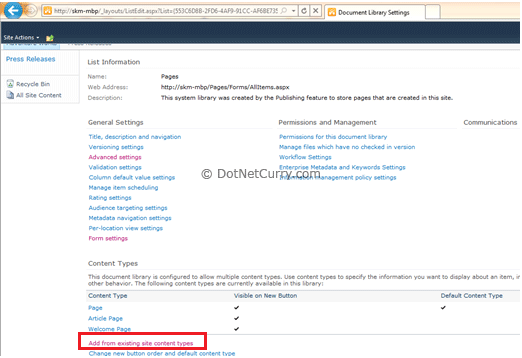
Step 13: Click on ‘Add from existing site content types’ to add our custom content type.
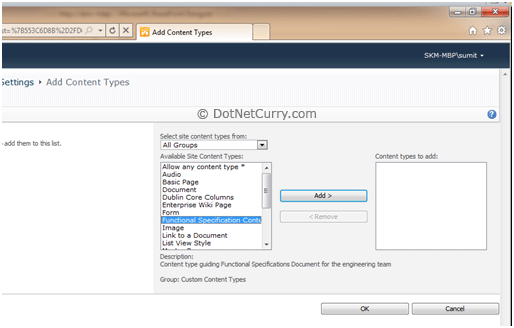
Step 14: In the Above screen select our custom content type ‘Functional Specifications Content Type’ and ‘Add’ it to the ‘Content Types to add’ list. Click OK.
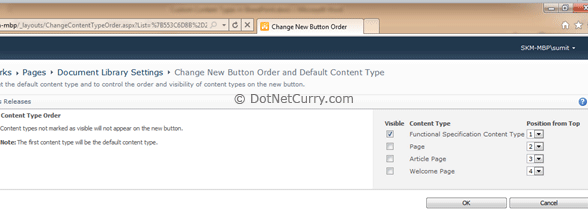
Step 15: Click on ‘Change new button order and default content type’ to disable rest of the templates.
Click on the ‘Title, description and navigation’ select ‘Yes’ for visibility in quick launch.
That’s about it. We are all set to test our custom page layout for our very own content type.
Step 16: In the quick launch bar on the left, click on Pages to go the page library. You’ll see a page called default. Ignore this.

Click on Documents ribbon and Select ‘New Document’.
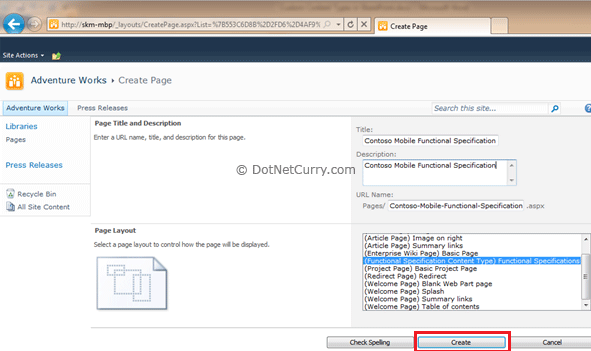
Step 17: You’ll be presented with Create new page screen. Fill in the ‘Title’ and ‘Description’. Change ‘URL Name’ if required.
Keep the Page Layout as functional specifications…
Click Create.
Step 19: You will navigate back to the Page library and our first functional spec will be ready for editing

Step 20: Click on the Name to see the custom page layout.
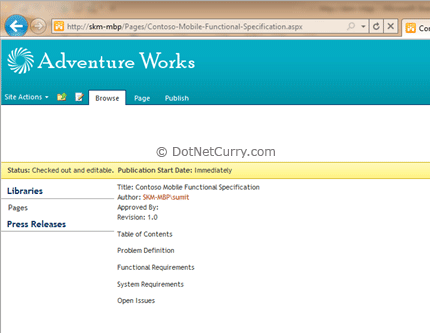
Ooohh so pretty!!!! (mimicking my 4 year old)
Now as you see SharePoint is saying the page is checked out and editable. Then why are all the controls read-only? One last step to go.
Step 21: Select the Page ribbon and click on Edit button.
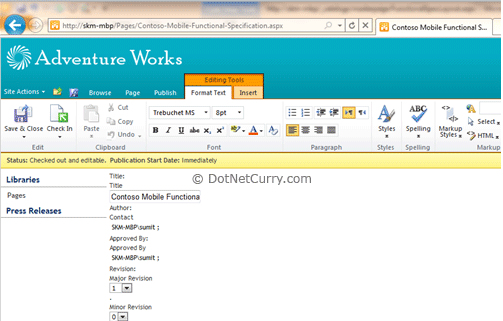
OMG where did my pretty page go! Well, we forgot to tell SharePoint not to display labels for the fields in our page layout. But we will ignore that for a moment and wonder at SharePoint’s versatility.
See how the Contacts have picker controls; Dropdowns come in for Choice and Rich text editors (that can pretty much do all the formatting you can do in Word) for Rich HTML fields. All this and “look mama no code”!

Disabling Content Type Field Labels in Edit Mode
We saw in Step 21 above how in Edit mode our custom page had duplicate labels. One provided by us in the layout page and another that corresponded to the Field Name of the Content Type. Ideally we would want complete control on our layout so we would like to hide the Column Name that comes automatically. To do this we go back to SharePoint designer and do the following steps.
Step 1: Select FunctionalSpecLayout.aspx from the Page Layouts folder and click on Edit. Say ‘Yes’ for all popups.
Step 2: For each field that we dropped add an attribute DisableInputFieldLabel with value ‘true’.

Step 3: Once all fields have been updated with the new attribute, Save the file.
Step 4: Click on ‘Page Layouts’ in the left pane. On the right pane, select ‘FunctionalSpecLayout.aspx’.
Step 5: In check-in confirmation dialog, check it in as a minor version.
Step 6: Navigate back to the Page library and edit the page. Confirm that the duplicate labels are now gone.
Conclusion
In this article we saw how a publishing site can be used to create custom content type and then define a custom page layout for the content type. So far we’ve not written a single line of code for all this work.
Next step in our learning process is to use the SharePoint workflow to take our document through an approval process. Even more interesting is development of a SharePoint feature that will convert this editable page into a non-editable document of record.
This article has been editorially reviewed by Suprotim Agarwal.
C# and .NET have been around for a very long time, but their constant growth means there’s always more to learn.
We at DotNetCurry are very excited to announce The Absolutely Awesome Book on C# and .NET. This is a 500 pages concise technical eBook available in PDF, ePub (iPad), and Mobi (Kindle).
Organized around concepts, this Book aims to provide a concise, yet solid foundation in C# and .NET, covering C# 6.0, C# 7.0 and .NET Core, with chapters on the latest .NET Core 3.0, .NET Standard and C# 8.0 (final release) too. Use these concepts to deepen your existing knowledge of C# and .NET, to have a solid grasp of the latest in C# and .NET OR to crack your next .NET Interview.
Click here to Explore the Table of Contents or Download Sample Chapters!
Was this article worth reading? Share it with fellow developers too. Thanks!
Sumit is a .NET consultant and has been working on Microsoft Technologies since his college days. He edits, he codes and he manages content when at work. C# is his first love, but he is often seen flirting with Java and Objective C. You can follow him on twitter at @
sumitkm or email him at sumitkm [at] gmail