VS 2010 Build Customization: Custom Activity Invoke Process
Posted by: Gouri Sohoni ,
on 11/30/2011,
in
Category Visual Studio
Abstract: In this article, we will discuss how to call an activity Invoke Process by customizing the process template in Visual Studio 2010.
In this article, we will discuss how to call an activity Invoke Process by customizing the process template in Visual Studio 2010. This article is in succession with previous articles for Build Customization Build Customization: Custom Activity with code, Build Customization: Custom Activity with xaml and Build Customization by Changing process template. I would suggest you to read these articles first to understand the flow.
This article uses a virtual machine which can be downloaded over here.
Step 1. Login as Abu Obeida Bakhach (Dev) with password as P2ssw0rd
Step 2. Create a workflow activity library named CustomActivity. Start Visual Studio 2010 from Microsoft Visual Studio 2010. Select File > New Project. Ensure that the language selected is C#.
Step 3. Select the project template of Activity Library and enter the name as CustomActivity and click the Ok button. Ensure that Add to Source Control option is checked

Make sure to specify the location in Iteration 2 in Development branch

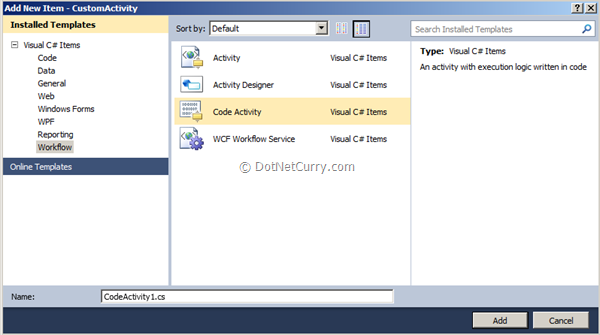
Step 4. Add Code Activity to the project
Step 5. Right click on the project in Solution Explorer and select properties. Change the target framework from client to full.

Click on the Yes button.
Step 6. Add references to following assemblies
Select the project template of Activity Library and enter the name as CustomActivity and click the Ok button. Ensure that option is checked Make sure to specify the location in Iteration 2 in Development branch Add Code Activity to the project Right click on the project in Solution Explorer and select properties. Change the target framework from client to full.Click on the Yes button. Add references to following assemblies
-
Microsoft.TeamFoundation.Build.Client, Microsoft.TeamFoundation.VersionControl.Client and Microsoft.TeamFoundation.WorkItemTracking.Client from C:\Program Files\Microsoft Visual Studio 10.0\Common7\IDE\ReferenceAssemblies\v2.0
-
Microsoft.TeamFoundation.Build.WorkFlow from C:\Program Files\Microsoft Visual Studio 10.0\Common7\IDE\PrivateAssemblies
-
System.Drawing from .NET tab
Step 7. Add an attribute to the code activity class as [BuildActivity(HostEnvironmentOption.All)] after including the reference to the following:
using Microsoft.TeamFoundation.Build.Client;
Step 8. Create a new build definition with the name as “Tailspin Toys Invoke Process”.
Step 9. Keep default trigger as Manual and specify workspace as follows. If custom activity does not appear, you will have to check in.

Step 10. Specify output folder in Build Defaults tab as \\WIN-GS9GMUJITS8\drops as shown below

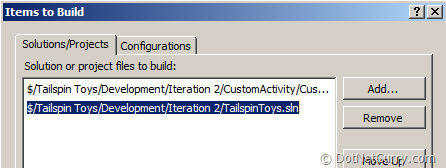
Step 11. Ensure that the Items to build dialog box contains both the solutions for custom Activity and Tailspin Toys, as shown below
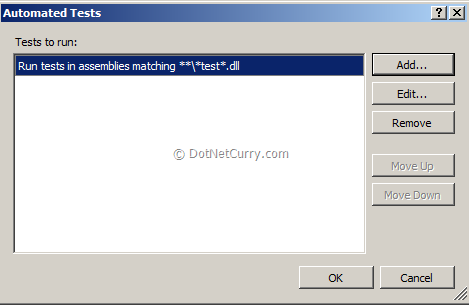
Step 12. Remove any automated tests to be executed on Build. In the process tab, select automated test and click on the Remove button. Click OK.
Step 13. Create a copy of the default template and name it as “InvokeProcessBuildProcessTemplate.xaml”

Make sure that the items to build has the selected custom activity, as well as the tailspin toys solution. Also make sure that no automated tests are to be executed as BVT. Save the build definition.
Step 14. Create a branch for InvokeProcessBuildProcessTemplate.xaml in the following manner as shown below, by using the Source Control Explorer.

Ensure the target folder is pointing to CustomActivity.
Step 15. Let us now create a console application which will be invoked using Invoke Process Activity. Right click on the solution in Solution Explorer and select the option of Add New Project. Select the project type as Console Application and provide name as ConsoleAppCreateFile

Step 16. The code will be similar to the following
static void Main(string[] args)
{
using (System.IO.StreamWriter sw = new
System.IO.StreamWriter("c:\\Test.txt"))
{
sw.WriteLine("Doing Code Analysis with Special tool");
}
}
Build the console application.
Step 17. Right click on the project name (CustomActivity) in Solution Explorer and select the option as Add New Item and the item of type Activity.
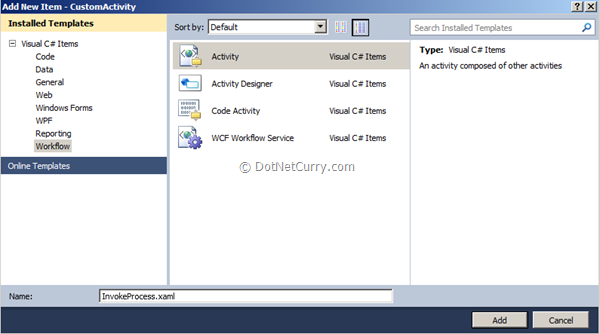
Specify the name as InvokeProcess as shown
Step 18. Drag and drop InvokeProcess activity from Toolbox on the designer. Drag and drop WriteBuildMessage and WriteBuildWarning as shown below:
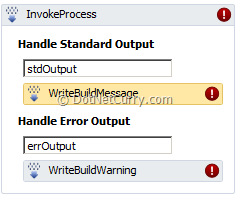
Configure the properties for InvokeProcess, WriteBuildMessage and WriteBuildWarning
Step 19. Specify a constant value for Message property in WriteBuildMessage and WriteBuildWarning. For InvokeProcess, specify file name as follows
"c:\users\abuobe\documents\visual studio 2010\Projects\CustomActivity\ConsoleAppCreateFile\bin\Debug\ConsoleAppCreateFile.exe".
This is the path for the console application. Save the xaml file.
For Custom Activity add references to System.Activities.Presentation, PresentationFramework and WindowsBase. Close InvokeProcess.xaml file and Build the custom activity project. In case you get an error for the .dll file, right click on the file and specify Check out for edit.
Step 20. Right click on CustomActivity and select the Add Existing Item and add the branched xaml file. Set the Build Action as None for this file.

Step 21. Open the file, collapse the sequence and add the InvokeProcess activity as follows

Save and close the file.
Step 22. Right click on the file in solution explorer and select View Code. Change local to ssgs.

Also change local to ssgs where InvokeProcess appears.
Step 23. Close and save the file. Check in the branch, merge to its original and check in.
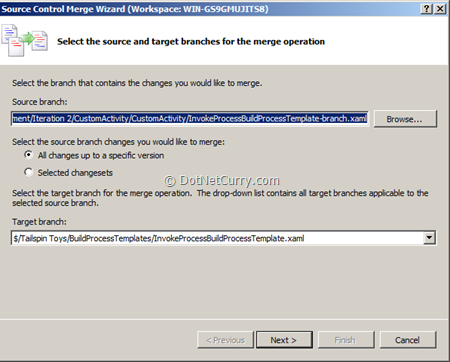
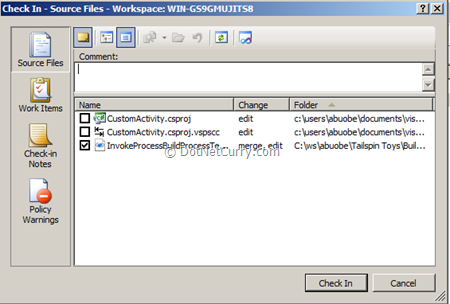
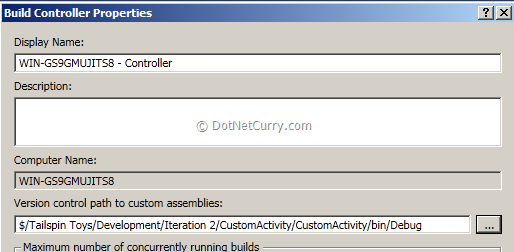
Step 24. Ensure that the CustomAssembly.dll is also checked in. Right click on Builds from Team Explorer. Specify the custom assembly path as follows
Step 25. Right click on the build and select queue new build. After successful execution of the build, the txt file gets created on C drive and the log shows execution of invoke process as follows.

That’s it! These were the steps to call an activity Invoke Process by customizing the process template in Visual Studio 2010.
This article has been editorially reviewed by Suprotim Agarwal.
C# and .NET have been around for a very long time, but their constant growth means there’s always more to learn.
We at DotNetCurry are very excited to announce The Absolutely Awesome Book on C# and .NET. This is a 500 pages concise technical eBook available in PDF, ePub (iPad), and Mobi (Kindle).
Organized around concepts, this Book aims to provide a concise, yet solid foundation in C# and .NET, covering C# 6.0, C# 7.0 and .NET Core, with chapters on the latest .NET Core 3.0, .NET Standard and C# 8.0 (final release) too. Use these concepts to deepen your existing knowledge of C# and .NET, to have a solid grasp of the latest in C# and .NET OR to crack your next .NET Interview.
Click here to Explore the Table of Contents or Download Sample Chapters!
Was this article worth reading? Share it with fellow developers too. Thanks!
Gouri is a Trainer and Consultant on Azure DevOps and Azure Development. She has an experience of three decades in software training and consulting. She is a graduate from Pune University and PGDCA from Pune University. Gouri is a Microsoft Most Valuable Professional (MVP) - Developer Technologies (Azure DevOps), Microsoft Certified Trainer (MCT) and a Microsoft Certified Azure DevOps Engineer Expert. She has conducted over 150 corporate trainings on various Microsoft technologies. She is a speaker with Pune User Group and has conducted sessions on Azure DevOps, SQL Server Business Intelligence and Mobile Application Development. Gouri has written more than 75 articles on Azure DevOps, TFS, SQL Server Business Intelligence and SQL Azure which are published on
www.sqlservercurry.com and
www.dotnetcurry.com. You can connect with her on
LinkedIn.