A couple of days ago, in my article Visual Studio 2012 LightSwitch - Getting Started with Building Business Applications, we introduced Visual Studio 2012 LightSwitch and created an application which fetches data from SQL Server database. In the second part of this series, today we will create an OData service using WCF Data Service using “Visual Studio 2012”. We will then see how to consume this OData service in Visual Studio 2012 LightSwitch Business Application. For this demonstration, I am using Windows 7 and Visual Studio 2012.
Let’s start by creating a WCF Data Service which will expose our Northwind database entities using ADO.NET Entity Data Model.
To create a WCF Data Service, open Visual Studio 2012 and create a New Web Site. Choose “WCF Service” and name it as “NorthwindODataService”. Now right click the “NorthwindODataService” in the Solution explorer and add a new item. Select the “ADO.NET Entity Data Model”. Name it as “Northwind”.
As soon as you add the Entity Data model, it asks you to add this in “App_Code” folder. Click on the yes button. Now you should see the Entity data model wizard. Choose “Generate from database” option and click on the “Next” button.
Choose the Northwind connection string now. In case you don’t have the connection string available, create a new connection and connect to the Northwind database. Now let’s make a choice of the “Customers”, “Orders” table from tables section as shown below –
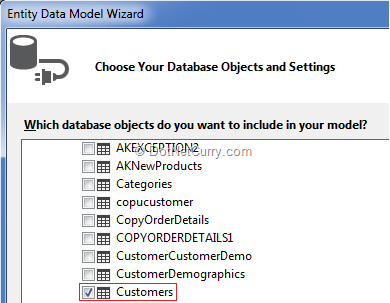
Click on the “Finish” button and you will see our entities with appropriate relationships in the Northwind.edmx designer surface.
The next step is to create a WCF Data Service. Right click the project and Add new item. Select the “WCF Data Service” and name it as “WcfDataService”. The WcfDataService.cs file comes with some default code. Replace the DataService <” /* TODO: put your data source class name here */”> with the name “NorthwindEntities” as shown below –
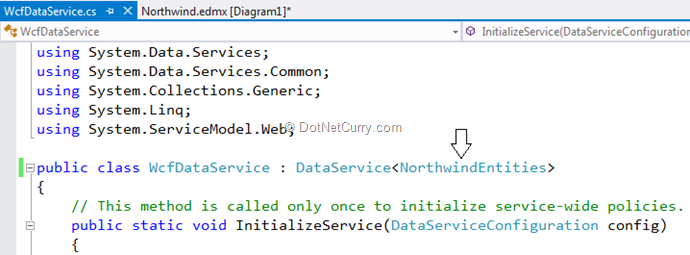
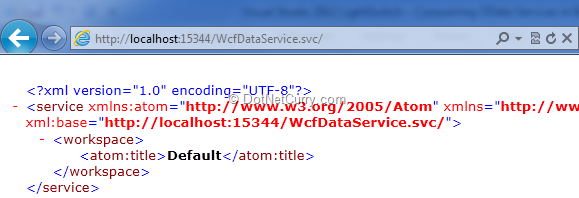
Now right click the “WCFDataService.svc” file from solution explorer and set click on “Set as startup page”. Press – “F5” which will run the WCF Data service. You should see a default output similar to the following –
Now go back to the WCFDataService.cs file, uncomment and modify the code from “InitializeService” method as shown below –

Press “F5” and you will see an output similar to the following:
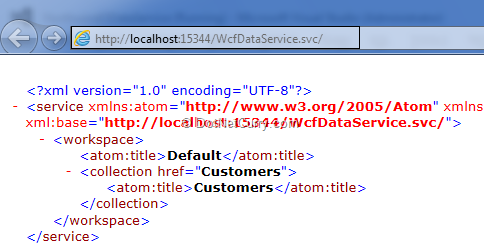
In the URL, type “Customers” and press the enter key as shown below –

In case, you see the XML feed instead of XML data, follow this procedure – Go to Internet Explorer. From the Tools menu, select Internet Options, click the Content tab, click Settings, and clear Turn on feed viewing.
You will now get all the customers data in XML format. You can try some options –
1) Fetch a record using Primary key value – http://localhost:15344/WcfDataService.svc/Customers('ALFKI')
2) Fetch a record using City column filter – http://localhost:15344/WcfDataService.svc/Customers?$filter=City e.g. 'London'
Likewise you can also perform different operations as per your business needs. Now let’s configure Orders entity in our InitializeService method. Add the following code in the method –
config.SetEntitySetAccessRule("Orders", EntitySetRights.AllRead);
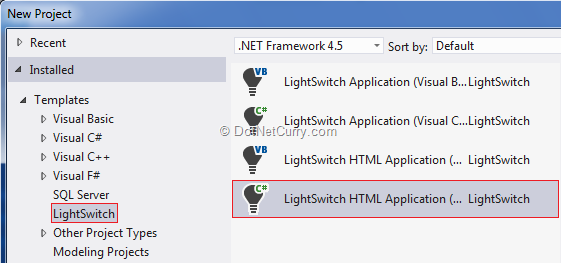
Now it’s time to create our LightSwitch HTML Application. Right click the Solution in our solution explorer and click on Add new Project. Choose the LightSwitch template and add a LightSwitch HTML Application with the name “NorthwindODataLightSwitchApplication” as shown below –
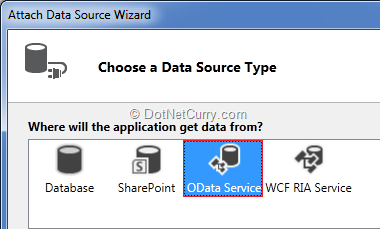
Once your project is ready, it will show you the “Start with data” screen. Clicking on the “Attach to external Data Source” displays the “Attach Data Source Wizard”. Choose “OData Service” as shown below –
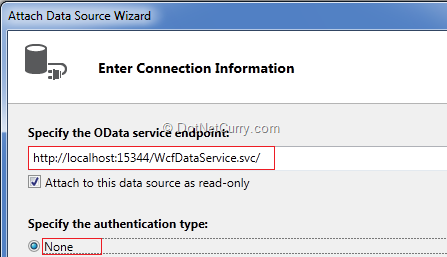
Click on the “Next” button. In this step of the wizard, you will be asked to specify the “OData Service Endpoint”. Specify the WCFDataService url with authentication type set to “None” as shown below –
Click on the “Finish” button. You should see the “Customer” entity with all its properties as well as the “Orders” table relationship. If you double click on “Orders” in the left top side, you will see “Order” entity with its properties.
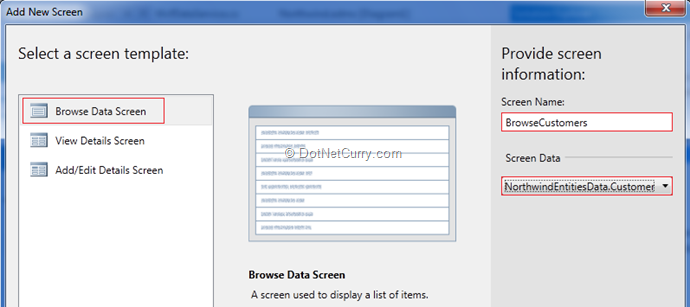
Now let’s go to the solution explorer. Under “NorthwindODataLightSwitchApplication”, you will find the “Client (Startup)” folder. Right click the folder and click on “Add Screen”. Select the “Browse Data Screen” template. Name the screen as “CustomersScreen” and choose the “NorthwindEntitiesData.Customers” from the ‘Screen data’ dropdown box, as shown below –
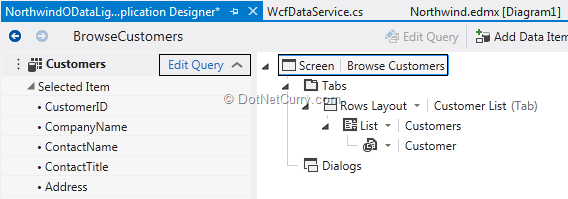
Click on the OK button and you will see the customer screen with its query as shown below –
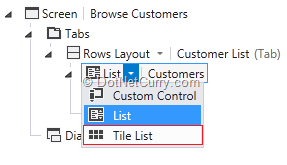
Let’s change the display of the customer from “List” to “Tile List” as shown below –
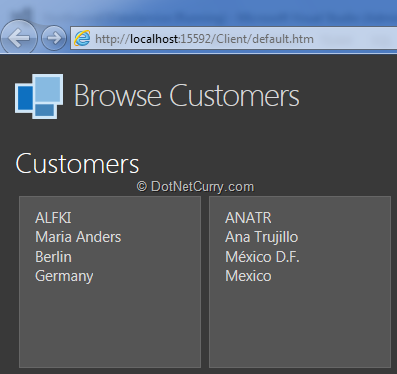
Now remove all the properties except “CustomerID”, “ContactName”, “City” and “Country”. Press “F5” to display the contents in browser. You will see an output similar to the following –
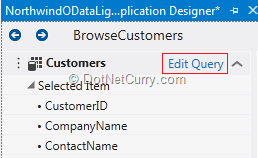
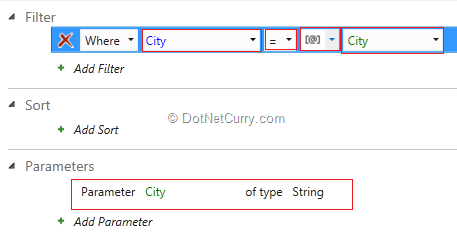
Add a filter with the parameter value to filter the customer’s data. From the left hand side, click on “Edit Query” link as shown below –
Click on “Add Parameter” button. Name the parameter as “City” and set its type to “String”. After this step, click on the “Add Filter” button. Choose the “City” property from the dropdown list. Set comparison parameter to “=” sign. Then choose “Parameter” and select the parameter name “City” from the dropdown list as shown below –
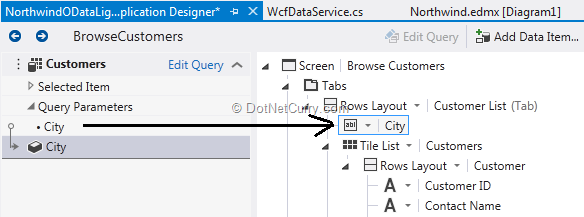
Now come back to the customers design screen and drag and drop the City filter on Customers design as shown below –
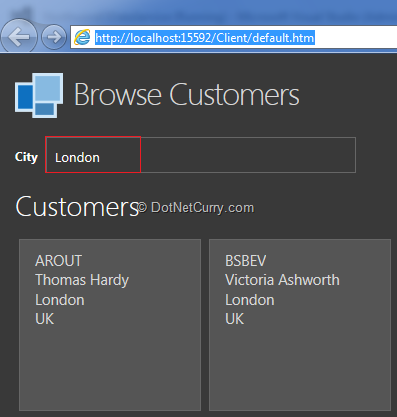
Now run your page. You will see a City filter with textbox. Enter city “London” and press tab key. You will see all the customers from London city on the page as shown below –
And that’s it. We just saw how to create and consume an OData Service in LightSwitch for building Business Applications.
This article has been editorially reviewed by Suprotim Agarwal.
C# and .NET have been around for a very long time, but their constant growth means there’s always more to learn.
We at DotNetCurry are very excited to announce The Absolutely Awesome Book on C# and .NET. This is a 500 pages concise technical eBook available in PDF, ePub (iPad), and Mobi (Kindle).
Organized around concepts, this Book aims to provide a concise, yet solid foundation in C# and .NET, covering C# 6.0, C# 7.0 and .NET Core, with chapters on the latest .NET Core 3.0, .NET Standard and C# 8.0 (final release) too. Use these concepts to deepen your existing knowledge of C# and .NET, to have a solid grasp of the latest in C# and .NET OR to crack your next .NET Interview.
Click here to Explore the Table of Contents or Download Sample Chapters!
Was this article worth reading? Share it with fellow developers too. Thanks!
Pravinkumar, works as a freelance trainer and consultant on Microsoft Technologies. He is having over 10 years of experience in IT and is also a Microsoft Certified Trainer(MCT). He has conducted various corporate trainings on all versions of .NET Technologies including .NET, SharePoint Server, Microsoft SQL Server, Silverlight, ASP.NET, Microsoft PerformancePoint Server 2007 (Monitoring). He is passionate about learning new technologies from Microsoft. You can contact Pravinkumar at dabade[dot]pravinkumar [attherate] gmail[dot]com