Besides the regular development work, there are tons of tools and practices that can make your life a lot easier as a developer. One of it is Continuous Integration and Continuous Delivery (CI/CD), a term you seem to see everywhere nowadays. And for a reason!
CI/CD can save you a lot of (repetitive) work and time that you can instead invest in what you love to do the most - developing. Moreover the chances of things going wrong when you automate a process, is reduced to a minimum.
This article is published from the DNC Magazine for Developers and Architects. Download this magazine from here [PDF] or Subscribe to this magazine for FREE and download all previous and current editions.
In this article, you will learn how to set up CI/CD for your Xamarin app with Visual Studio Team Services (VSTS), Bitrise and HockeyApp - completely for free!
Continuous Integration (CI) Continuous Deployment (CD) for Xamarin
As a developer, receiving feedback on your work early on, helps. Depending on what your requirements are, you want to know if your (unit) tests still succeed, or if your code plays well with the rest of the application, or the code builds not just ‘on my machine’, but on everyone else’s too.
With the acquisition of Xamarin and HockeyApp, Microsoft now has a complete and fully automated build pipeline which we developers can benefit from.
In this article, we will discuss how to setup a mature and extensive building platform, without spending a dime on it! Each service in use will be discussed, followed by how they can all be combined to build and deliver apps in a continuous fashion.
Visual Studio Team Services
If you have been developing in .NET, I’m going to assume that you have worked with Team Foundation Server (TFS) before. It has been a couple of years since TFS got an online cousin called Visual Studio Team Services (VSTS). This version offers everything that the on-premises TFS has to offer, and probably even more! When you are using it with a small team up to five people, you can use it completely for free.
If you have an MSDN subscription, these users do not count towards that limit of five, so you can have even bigger teams.
You will probably know that VSTS can be used as a code versioning system, but if you login to the web portal, you will see that it can be used for a lot more. Take a look at Figure 1 for instance.
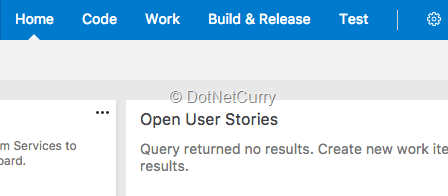
Figure 1: menu structure within VSTS
If we just look at the tabs that are available to us, we will find that everything that we would need, can be done from within VSTS. From the options we see, we could guess that we can manage our code, and even manage our work with work items on digital Scrum boards etc. So much so, even building and releasing can be done (the focus of this article), and last but not the least, we can define our tests and results too.
If we were building a fairly standard .NET or Azure application, this would all be true without any limitations. But in the case of a mobile (Xamarin) app, not so much. Especially when we focus on iOS for which Apple still requires you to have a Mac to build your app on.
While Microsoft now does offer some templates to setup builds for Xamarin, you still need to supply your own Mac hardware as a build agent to get it to work. Since I promised you we would do it for free, I won’t get into this option. Another option would be to rent a Mac with services like Macincloud.com, but again, its not free.
For Android and Windows Phone (or Universal Windows Platform) apps, you can work with the default build agent installation that Microsoft provides you with.
Another service that does provide you with a Mac to build your apps on, is Bitrise. I will talk about this awesome service in a little bit. I just have to mention that before you can integrate a third-party service into VSTS, I would recommend you to use Git as a versioning system. Git option is now available from VSTS and they even default to it.
By using the very popular Git, you are now able to let other services access the repository easily and work with your code. You can also swap out VSTS for Github, or any other popular Git service.
Bitrise
Bitrise is a new PaaS Continuous Integration and Deployment platform specializing in apps. They offer a free tier which should be enough for every hobby developer. There are of course some limitations like: 2 team members, max. 10 minute builds and max. 200 builds per month, but to start with, it is more than enough. Should you need more over a period of time, there is just one paid tier which is 50 dollars (at the time of this writing) and gives you pretty much everything unlimited. If you want more concurring builds, just add 50 dollars for each concurrency you would like to add.
You can find them at https://bitrise.io, and sign up easily with the ‘Sign Up’ button in the upper-right. While signing up, you can use your GitHub, Bitbucket or GitLab account, and your repositories will be linked automatically. If you do not want that and want to use VSTS instead, just create a new stand-alone account by simply specifying a username, email and password.
Figure 2: everything is a service at Bitrise
Everything at Bitrise is web-based, carries a modern look and is easy to use. You can easily create your app, compile a workflow with the steps that are needed to build your app, and of course trigger a build. Everything is open source so you can even contribute something to the workflow. A lot of developers already have contributed, therefore a lot of steps for your workflow are already available. For instance, you can put your app through Xamarin Test Cloud, send it to HockeyApp to be distributed, automatically set up your version number, or upload your app directly to the Google Play Store and/or App Store.
HockeyApp
If you have already developed an app before, you will probably know that Google and Apple both have possibilities to distribute it as a beta version.
You could also do that through a third-party - HockeyApp.
HockeyApp has a couple of advantages over other vendors. It has more extensive features, offers your users a more unified experience and besides testing, you can also collect crash reports and statistics.
Just like Bitrise, HockeyApp offers a free plan to start with. You can add two apps, but with unlimited versions and collecting crash reports etc. Plans after that start at 10 dollars per month for personal licenses and 30 dollars for businesses.
Automated Pipeline - Putting it all together
How can we put these services together to create an integrated, automated pipeline that you do not need to worry about?
If we put it into an image, this is how we would like to achieve delivery.
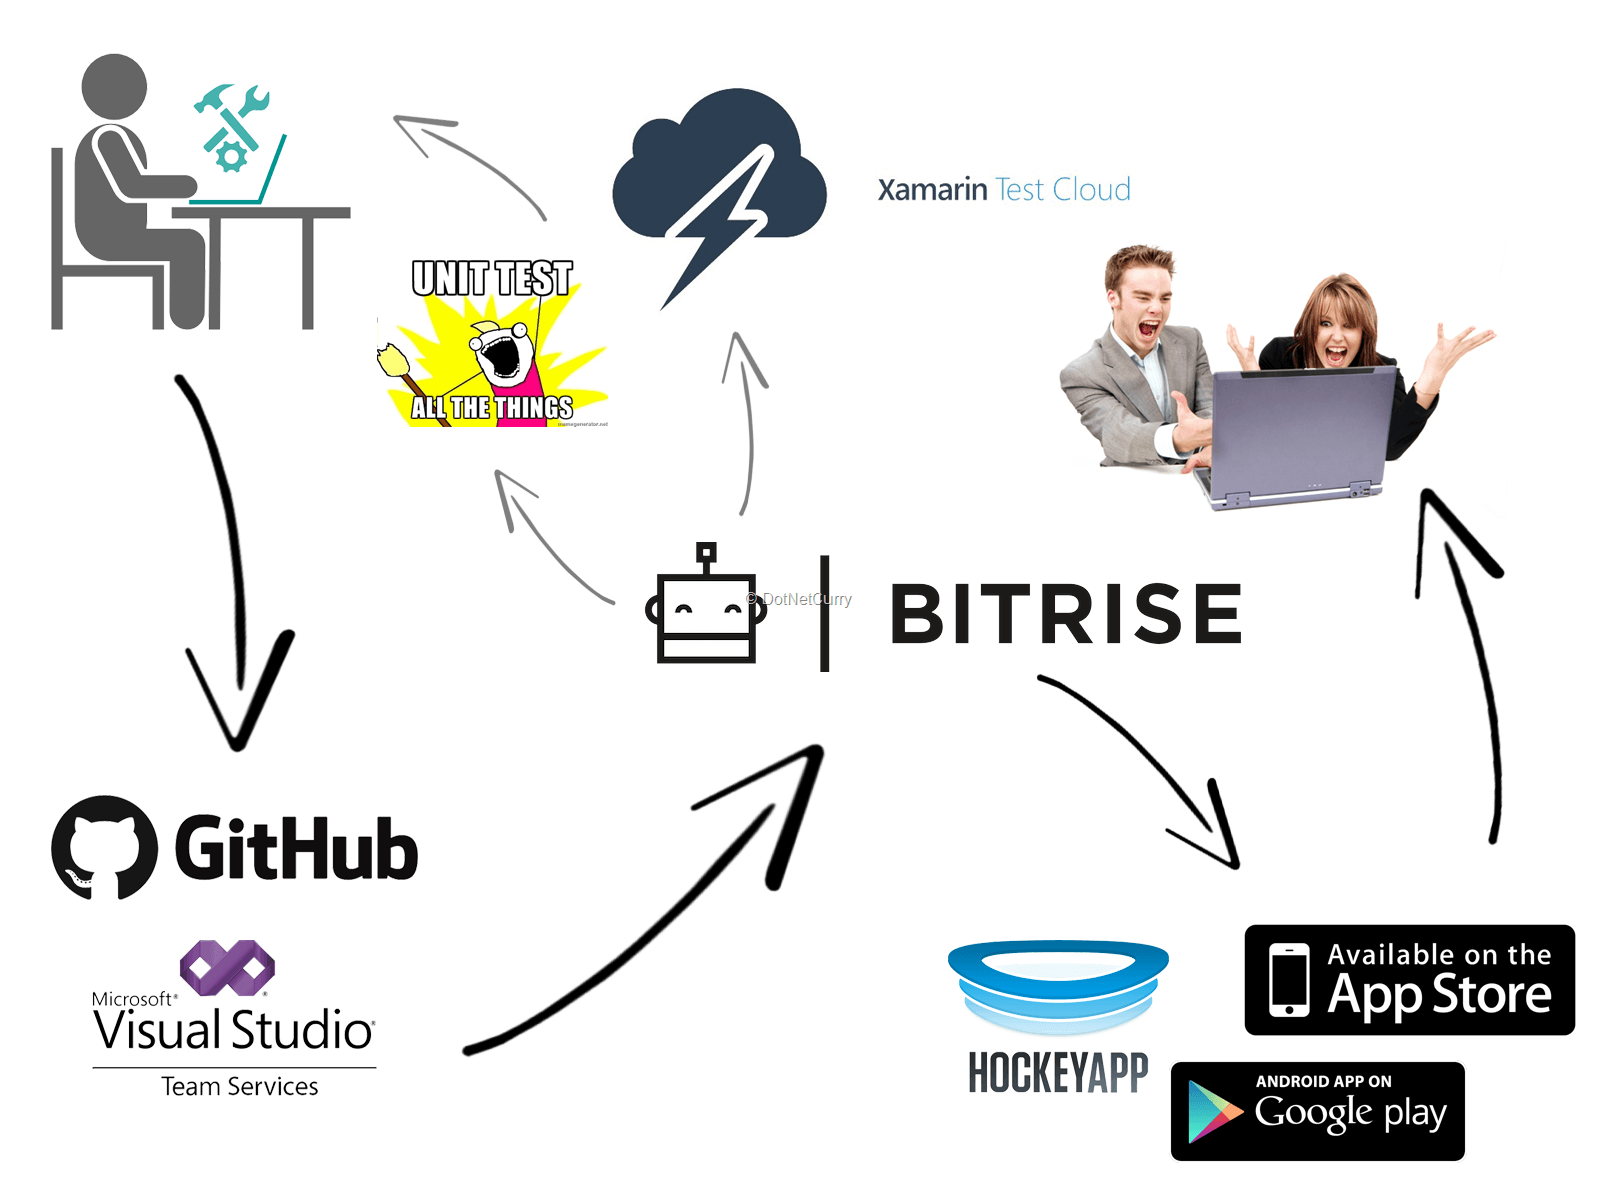
Figure 3: how we would like to handle delivery
As a developer, we commit out code to VSTS or GitHub, which sends a request to Bitrise, which in turn starts a build. Depending on how we have configured that build, it will generate a binary, put it through Test Cloud or any other kinds of tests, and distribute it through HockeyApp of the app stores.
Of course, you can customize this any way you like, but this setup will suffice for now. For this article, I will leave testing out of scope because you could write multiple articles on just that subject. Instead I will focus on the bare minimum: commit, build, distribute.
The start of our journey is to create a new build definition on Bitrise. This can be done by simply pushing the ‘Add new app’ button. After doing so, you are taken to a screen where you must configure your repository. If you signed up using Github or similar, you will probably see all your repositories there and it should be pretty straight-forward.
We will be focusing on making it work with VSTS.
Since you can only make private repositories in VSTS, you need a way to make it accessible from third-party solutions. This can be done by either generating alternative credentials, or using SSH keys. We will be using the latter.
Go to the project you want to build with Bitrise, and get the clone URL. You can do this by going to the ‘Code’ screen in your Team Project and find the ‘Clone’ button in the upper-right corner. Make sure you get the SSH url by clicking the ‘HTTPS | SSH’ button. You can recognize it because it starts with ‘ssh://’.
Now when we go back to Bitrise, we notice VSTS is not one of the pre-configured providers, so select the ‘Other/manual’ option and paste in the clone URL you just found in VSTS and click ‘Next’. To authorize access to the private VSTS repository, you need to verify access with an additional SSH key. Since it cannot be added automatically, click the ‘I need to’ button as seen in Figure 4.

Figure 4: add the SSH key
After you press the button, you will be presented with an SSH key. You have to add this to VSTS to confirm that you have admin access to your private repository. Copy the text and go back to your VSTS account.
Remember where you got the SSH url for cloning the repository? Go back there and click ‘Manage SSH keys’ this time. In the new screen that comes up, click ‘Add’ and give the key a description, and paste the copied value from Bitrise in the ‘Key Data’ field. Save the new key and go back to Bitrise. Click ‘I’ve added the SSH key’ to continue.
After selecting the repository and having scanned it, Bitrise will automatically detect that it is an Xamarin app, as you can see in Figure 5. When clicking the ‘Manual’ button, you can also see that apps in their native languages are supported. But since we want to use the Xamarin app – that should be detected – just go back to the detected screen, and select the solution you want to build.
After you have selected the solution, choose the build configuration – Debug or Release – and platform.
Note, that you need to create a release build to be able to distribute it. These configurations are all extracted from your solution file which you have created from within Visual Studio or Visual Studio for Mac (formerly known as Xamarin Studio). You will be asked for Xamarin credentials. Since Xamarin is free nowadays, you do not need to enter these anymore. Just click the ‘Skip this step’ button.
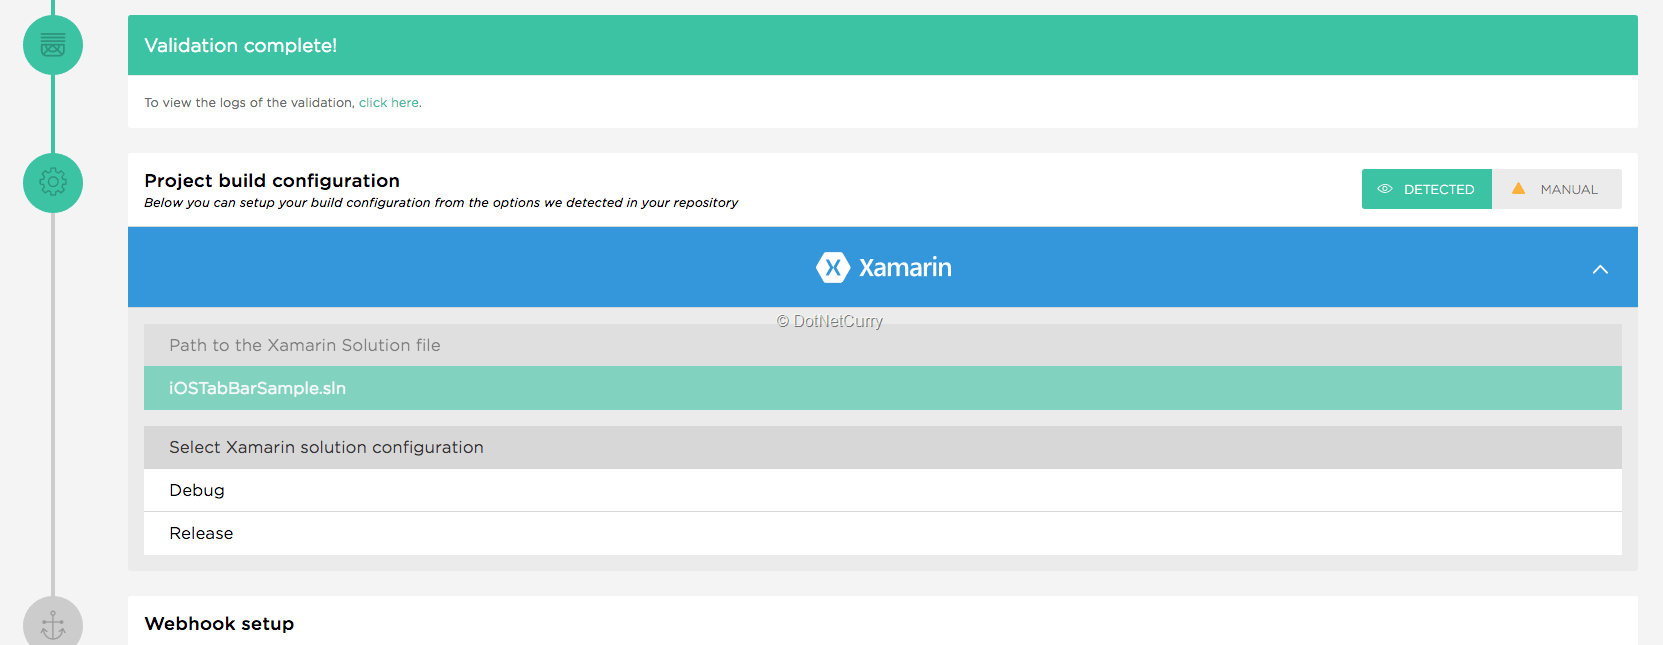
Figure 5: selecting the build configuration
As a final step to initially configure our build, we can create a webhook. This installs a webhook in VSTS which calls Bitrise. This is needed as when you commit new code, VSTS will know it has to call the webhook to notify Bitrise that an action is needed. In the case of Github and others, it can automatically register a webhook for you, although for VSTS, you need to set it up yourself. We will see how to do this in a little bit.
Including this method, there are three ways to trigger a build: manually from the web interface, calling the ‘Trigger API’ they made available, or through the webhook in your repository.
When your configuration is done, a first build is automatically triggered to see if everything is working as it should.
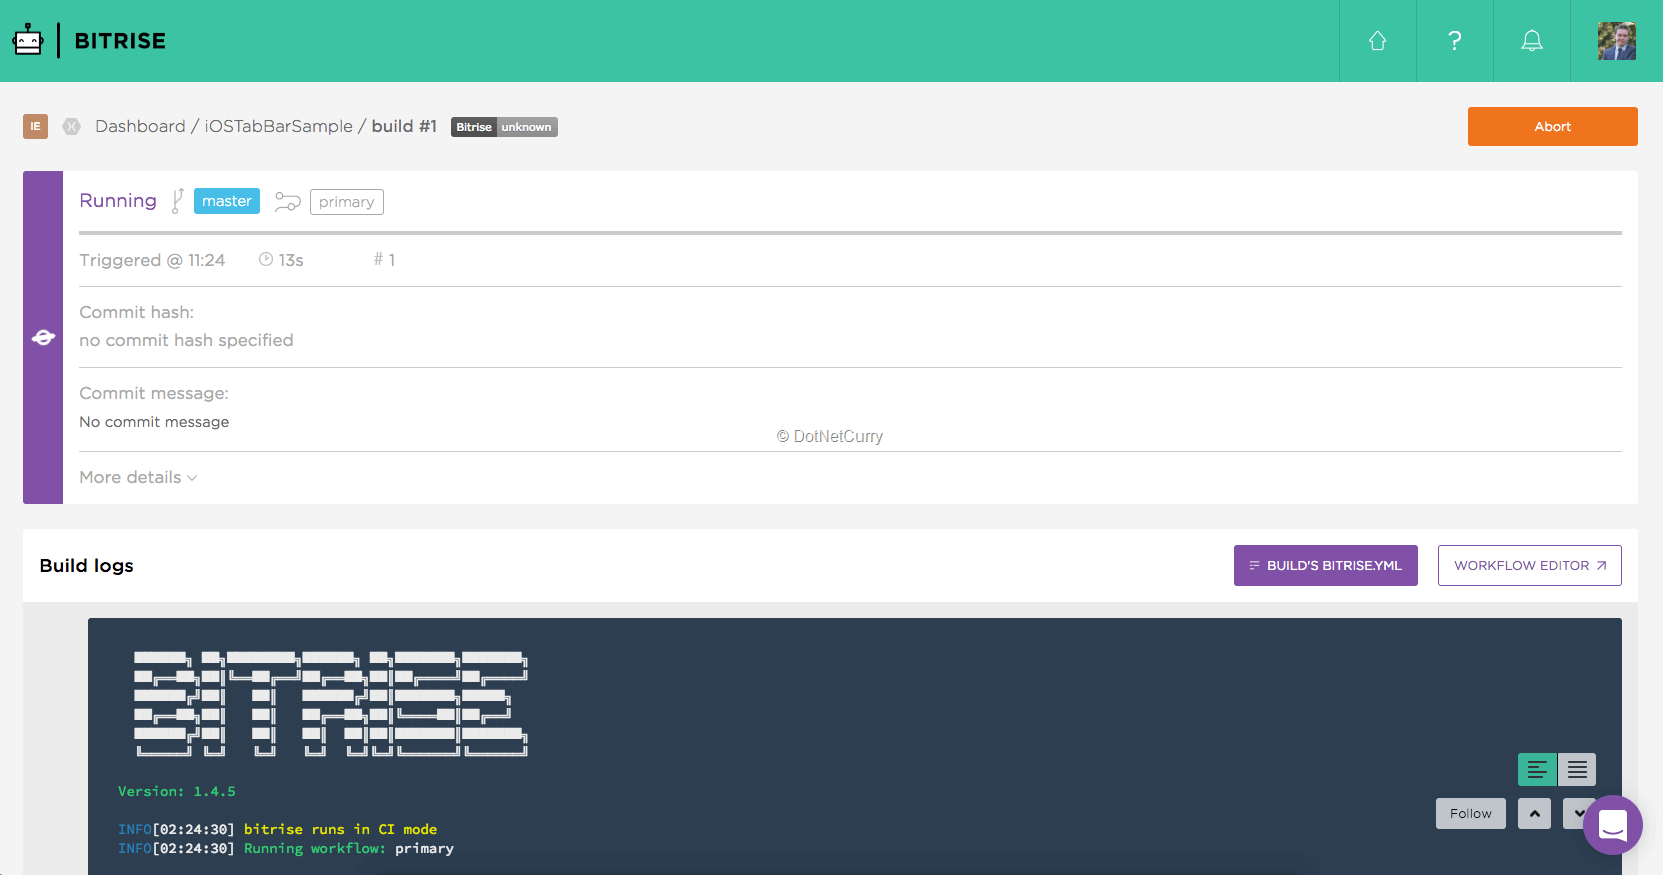
Figure 6: our very first build
During build, a very verbose log scrolls over your screen, with each step that runs. This way you can trace what is happening, or more important; what went wrong at what stage. The point of all this is of course that you do not want to wait for the build. So you can just carry on working, and an email with the results will be sent to you once the job is done.
Building your app will most likely succeed right away (hooray!) however, to actually distribute or run it on a device, you need to sign your binary file, especially with iOS. Since we didn’t do any actual configuration on what our build does, it has not been signed yet. Before we will look at how to do this, let’s go back to setting up the webhook.
To do so, go to VSTS and navigate to the project you are building. Go to the cogwheel in the upper bar and select ‘Service Hooks’. Click the plus button to add a new one and select ‘Web Hooks’ as a provider. After clicking ‘Next’, set the trigger to ‘Code pushed’ and under filters, select the repository you want to build. Additionally you can specify the branch or even the user.
After you have configured it as you want to, go to the next screen. The last thing you need to configure here is the url that needs to be called when the trigger is fired. You can find this in your Bitrise build definition. Go to the app you have created, and into the ‘Code’ tab. Under the ‘Webhooks’ title, you can select VSTS as a provider, and Bitrise will give you the url that is to be called from the webhook. Paste this back into VSTS and you’re done! A build is now triggered when you push code to the repository.
Back to signing our binaries. I am going to assume that you have some knowledge on how to sign and distribute an iOS and Android app. This can be a somewhat complex procedure and is beyond the scope of this article. If you do not have any experience with signing binaries, you can learn how to do this with the Xamarin documentation here for iOS and Android here.
To customise the workflow of a build, go to your app and click on the ‘Workflow’ tab. Here you will see the default workflow that has been compiled for you by creating this app. The concrete implementation can differ depending on the template that has been selected when creating the app in Bitrise. But roughly it will be retrieving the code, restoring the required (NuGet) packages, building the actual app, and deliver the resulting binary. Files that are delivered are referred to as artifacts.
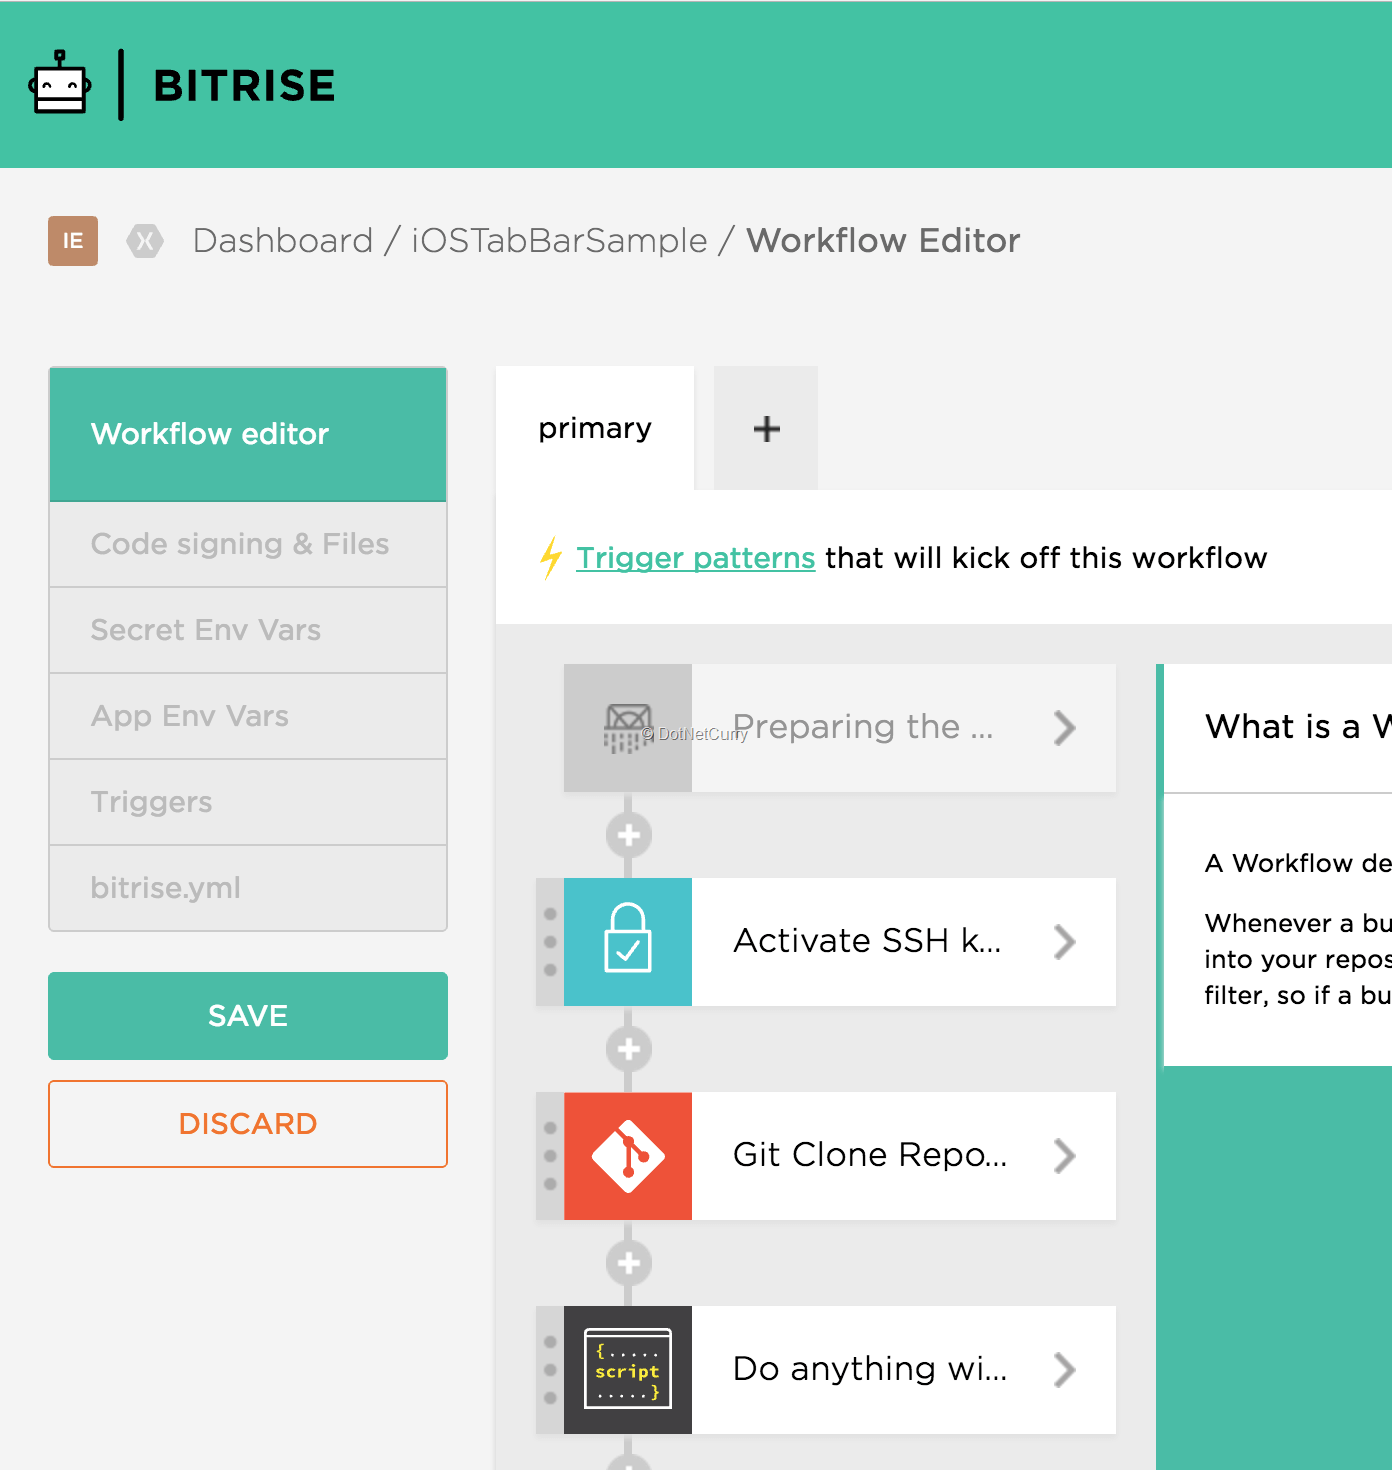
Figure 7: steps in the workflow
If you want to customise your build, you can just click on any plus sign and add a step there. You can also rearrange them once you have added them. Since everything is open-source and the developers of Bitrise allow for other developers to add their own build steps, there is already a big library with all kinds of steps you can add. There are very useful steps in there - like for versioning your app, incorporating tests but also more fun steps like getting a quote of the day in your build log.
On the far left, you will also see an option called ‘Code signing & Files’. This is where you need to upload your Provisioning Profile and p12 certificate for your iOS app. In case of an Android app, you will need to add a ‘Sign APK’ step to your workflow and configure it with the keystore file.
After you have configured this right, and your build still works, we will now have binaries we can distribute through HockeyApp!
If you do not already have an account there, sign up for one. To start off, it is completely free if you do not need more than two apps. When you are creating multi-platform apps with Xamarin, unfortunately it still counts as one app per platform. So if you are targeting Android and iOS, that is two apps.
When you log into HockeyApp, you can create an app, just like you did with Bitrise. Click the ‘New App’ button and then choose to create it manually.
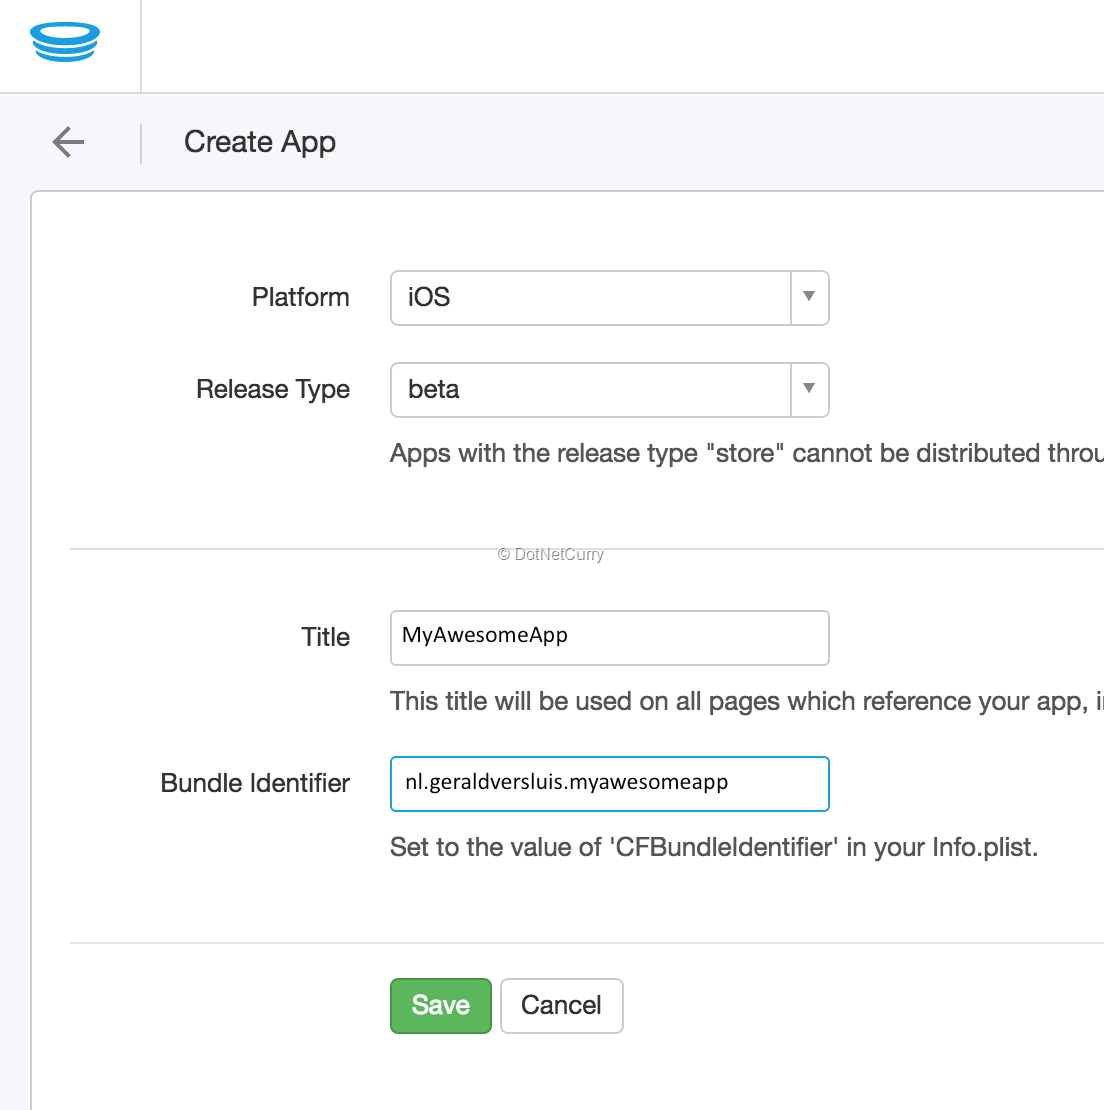
Figure 8: creating your app in HockeyApp
After specifying the necessary details and saving your app definition, you will be taken to the dashboard. There are two things we need from HockeyApp - the App ID which helps determine which HockeyApp definition is coupled with which Bitrise build; and the API key needed to make a connection between Bitrise and HockeyApp. You can find the App ID in HockeyApp right on the dashboard of your app, in the top left corner. Note it for now and then go to the upper-right corner, click your avatar and choose ‘Account Settings’. Under ‘API Tokens,’ you can create a new token which you can use with Bitrise. Configure it however you want to and also note this API key.
Of course there are a lot more things you can configure in HockeyApp, like your team or user groups to distribute your app to, etc. I invite you to explore that for yourself. To get versions over for distribution, this is enough for now.
For now go back to Bitrise and edit your workflow again. Just before the last step (Cleaning up the virtual machine) add one new step (or two if you’re doing both iOS and Android from one build). The step is called ‘HockeyApp
Deploy’, where platform is of course iOS or Android. Add the API token and App ID to the configuration and save it. Figure 9 shows how it looks at the end.
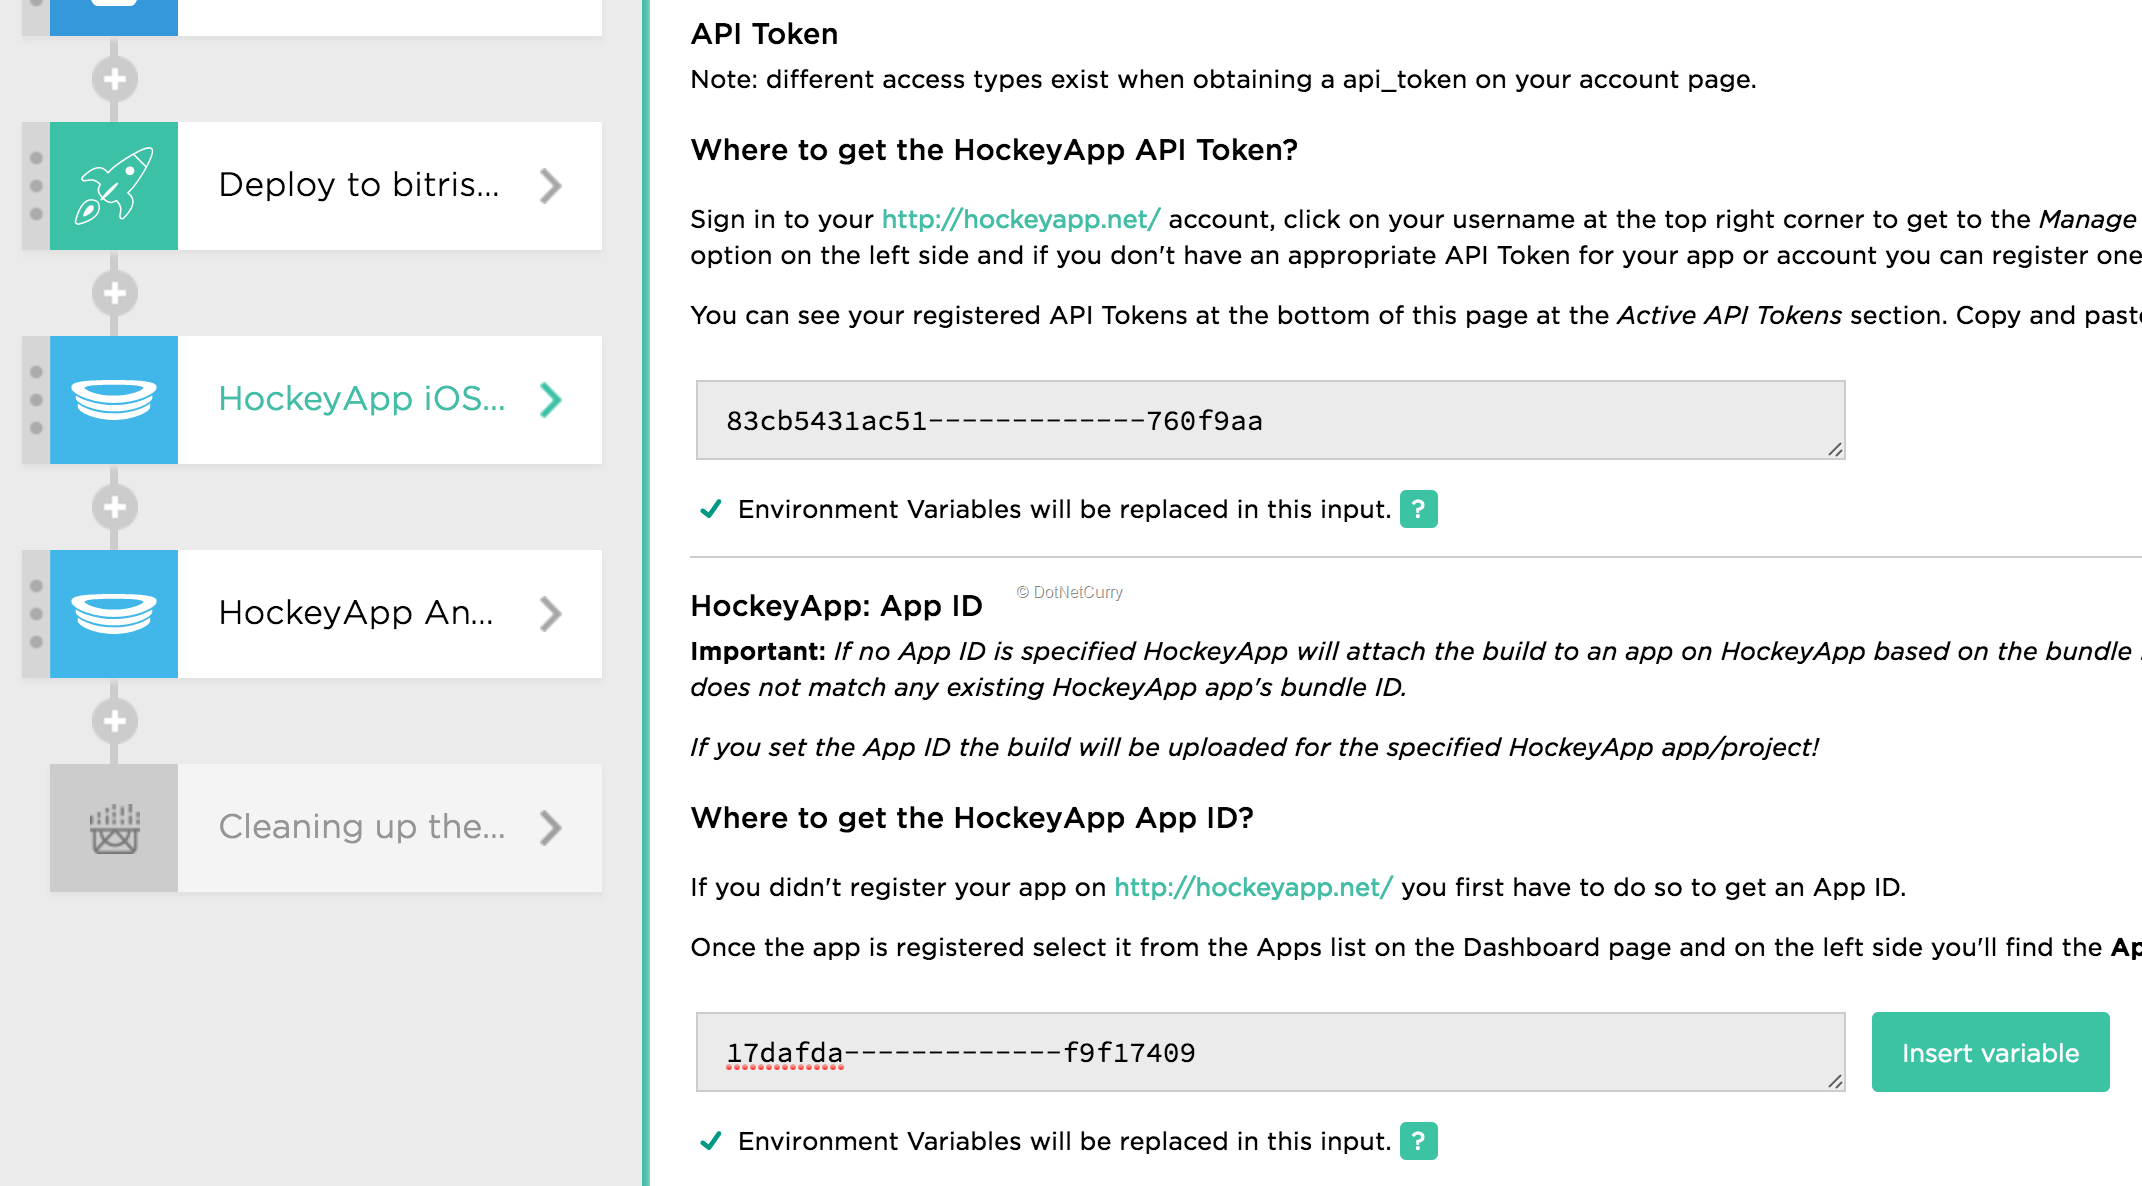
Figure 9: complete HockeyApp configuration in Bitrise
By saving the configuration, you have now completed your pipeline. Congratulations! Whenever you do a commit to your repository, a build is triggered on Bitrise, which will go through this workflow. If all goes well, it signs your binaries and sends them over to HockeyApp. Depending on the configuration there, your testers and/or end-users will automatically get notified and can download the new version of your app.
All of this, without any direct input from you.
Of course there are a lot more configuration options available for you to play with, you can completely shape everything according to your requirements.
While writing this article, Microsoft has announced the Visual Studio Mobile Center at Connect();. This solution is very similar to what Bitrise offers (including a Mac build machine!) but takes it even a step further with deeper integration with Xamarin Test Cloud and HockeyApp, since these are now Microsoft products. Although the mobile center is at an early stage right now and works only with GitHub repositories, a lot of exciting features are still to come. You can sign up right now using the ‘Get started for Free’ button on the website.
Conclusion
This article demonstrated how to set CI/CD up for your Xamarin app for a small team, with Visual Studio Team Services (VSTS), Bitrise and HockeyApp, completely for free!
This article has been editorially reviewed by Suprotim Agarwal.
C# and .NET have been around for a very long time, but their constant growth means there’s always more to learn.
We at DotNetCurry are very excited to announce The Absolutely Awesome Book on C# and .NET. This is a 500 pages concise technical eBook available in PDF, ePub (iPad), and Mobi (Kindle).
Organized around concepts, this Book aims to provide a concise, yet solid foundation in C# and .NET, covering C# 6.0, C# 7.0 and .NET Core, with chapters on the latest .NET Core 3.0, .NET Standard and C# 8.0 (final release) too. Use these concepts to deepen your existing knowledge of C# and .NET, to have a solid grasp of the latest in C# and .NET OR to crack your next .NET Interview.
Click here to Explore the Table of Contents or Download Sample Chapters!
Was this article worth reading? Share it with fellow developers too. Thanks!
Gerald Versluis (@jfversluis) is a full-stack software developer and Microsoft MVP (Xamarin) from Holland. After years of experience working with Xamarin and .NET technologies, he has been involved ina number of different projects and has been building several apps. Not only does he like to code, but he is also passionate about spreading his knowledge - as well as gaining some in the bargain. Gerald involves himself in speaking, providing training sessions and writing blogs (https://blog.verslu.is) or articles in his free time. Twitter: @jfversluis Email: gerald[at]verslu[dott]is . Website:
https://gerald.verslu.is