Any testing strategy should ensure that the entire application works together as expected!
In a previous article Unit Testing ASP.NET Core Applications, we discussed a testing strategy involving unit, integration and end-to-end methods. We discussed how Unit Tests lead you towards a better design and allow you to work, without being afraid of modifying your code.
We added unit tests to a simple example ASP.NET Core project that provided a very straightforward API to manage blog posts.
This is the second entry in a series of tutorials on testing ASP.NET Core applications.
Are you keeping up with new developer technologies? Advance your IT career with our Free Developer magazines covering C#, Patterns, .NET Core, MVC, Azure, Angular, React, and more. Subscribe to the DotNetCurry (DNC) Magazine for FREE and download all previous, current and upcoming editions.
In this article, we will use the same ASP.NET Core project and take a deeper look at Integration Tests in the context of ASP.NET Core applications, dealing with factors like the Database, Authentication or Anti-Forgery.
The code discussed through the article is available on its GitHub repo.
The Need for Integration Tests
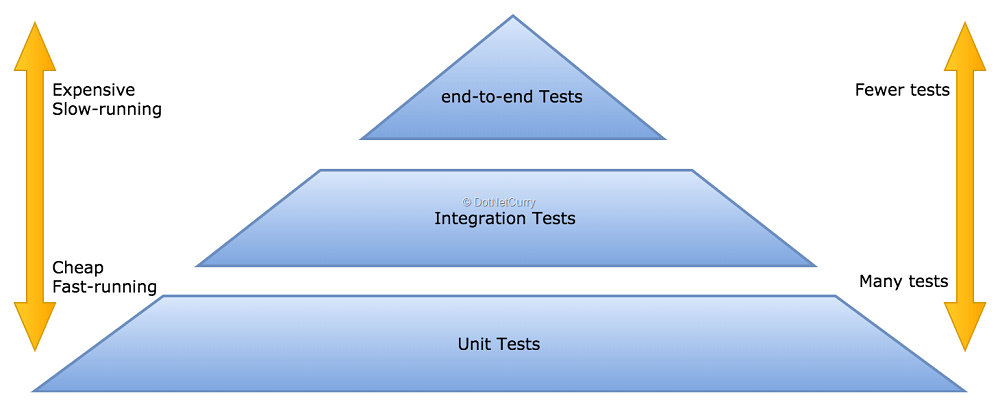
In a previous article of the series (on Page []), we introduced a testing strategy based on the following Testing Pyramid:

Figure 1, the Testing Pyramid
We then took a deeper look at the base of the pyramid, the Unit tests!
While valuable, I hope it became clear that having only unit tests in your strategy is a risky approach, that will leave many aspects of your application uncovered.
- Unit Tests abstract dependencies, but many parts of your application are dedicated to deal with dependencies like databases, 3rd party libraries, networking, …
- You won’t cover those with unit tests or will replace them with mocks, so you won’t really know you are using them properly until higher level tests like integration and end-to-end tests can prove it so!
If you are anything like me, after going through the article dedicated to Unit Tests, you will be eager to learn how to complement those tests with higher level ones.
Now we will start writing integration tests, which will:
- Start the application using a simple Test Host (instead of a real web host like Kestrel or IIS Express)
- Initialize the database used by Entity Framework using an InMemory database instance that can be safely reset and seeded
- Send real HTTP request using the standard HttpClient class
- Keep using xUnit as the test framework, since every integration test is written and run as an xUnit test
Let’s start again by adding a new xUnit Test Project named BlogPlayground.IntegrationTest to our solution. Once added, make sure to add a reference to BlogPlayground as the integration tests will need to make use of the Startup class and the Entity Framework context.
Editorial Note: Make sure to download the sample ASP.NET Core project before moving ahead.
There is one more thing to be done before we are ready for our first test. Add the NuGet package with the Test Host: Microsoft.AspNetCore.TestHost.
Writing Integration Tests for ASP.NET Core apps with the Test Host
Writing a test that hits the default home index url “/” would be as straightforward as using the Test Host to write a test like the following one:
public class HomeTest
{
    private readonly TestServer _server;
    private readonly HttpClient _client;

    public IndexTest()
    {
        _server = new TestServer(WebHost.CreateDefaultBuilder()
            .UseStartup<Startup>()
            .UseEnvironment("Development"));
        _client = _server.CreateClient();    }

    public void Dispose()
    {
        _client.Dispose();
        _server.Dispose();
    }

    [Fact]
    public async Task Index_Get_ReturnsIndexHtmlPage()
    {
        // Act
        var response = await _client.GetAsync("/");

        // Assert
        response.EnsureSuccessStatusCode();
        var responseString = await response.Content.ReadAsStringAsync();
        Assert.Contains("<title>Home Page - BlogPlayground</title>", responseString);
    }
}
You can run it as any of the previous unit test files, since we are using the same xUnit test framework. Either run it from Visual Studio or from the command line with dotnet test.
However, your test will fail as it runs into a few problems!
The first problem is that your views will not be found because the content root taken by the Test Host is based on the BlogPlayground.IntegrationTest project, but it should be set as the BlogPlayground project. To solve this, you can add the following workaround to your setup code, or read Accessing Views in the docs to learn how to avoid hardcoding the path:
public IndexTest()
{
    var integrationTestsPath = PlatformServices.Default.Application.ApplicationBasePath;
    var applicationPath = Path.GetFullPath(Path.Combine(integrationTestsPath, "../../../../BlogPlayground"));

    _server = new TestServer(WebHost.CreateDefaultBuilder()
        .UseStartup<Startup>()
        .UseContentRoot(applicationPath)
        .UseEnvironment("Development"));
    _client = _server.CreateClient();
}
Once you solve the view location problem, you will hit another one compiling the views. To resolve it, you will need to update BlogPlayground.IntegrationTest.csproj adding the PreserveCompilationContext property and a new Target item that will copy the necessary .deps.json file as in the following snippet:
<PropertyGroup>
  <TargetFramework>netcoreapp2.0</TargetFramework>

  <IsPackable>false</IsPackable>
  <PreserveCompilationContext>true</PreserveCompilationContext>
</PropertyGroup>
…
<!--
  Work around https://github.com/NuGet/Home/issues/4412.
  MVC uses DependencyContext.Load() which looks next to a .dll
  for a .deps.json. Information isn't available elsewhere.
  Need the .deps.json file for all web site applications.
-->
<Target Name="CopyDepsFiles" AfterTargets="Build" Condition="'$(TargetFramework)'!=''">
  <ItemGroup>
    <DepsFilePaths Include="$([System.IO.Path]::ChangeExtension('%(_ResolvedProjectReferencePaths.FullPath)', '.deps.json'))" />
  </ItemGroup>
  <Copy SourceFiles="%(DepsFilePaths.FullPath)" DestinationFolder="$(OutputPath)" Condition="Exists('%(DepsFilePaths.FullPath)')" />
</Target>
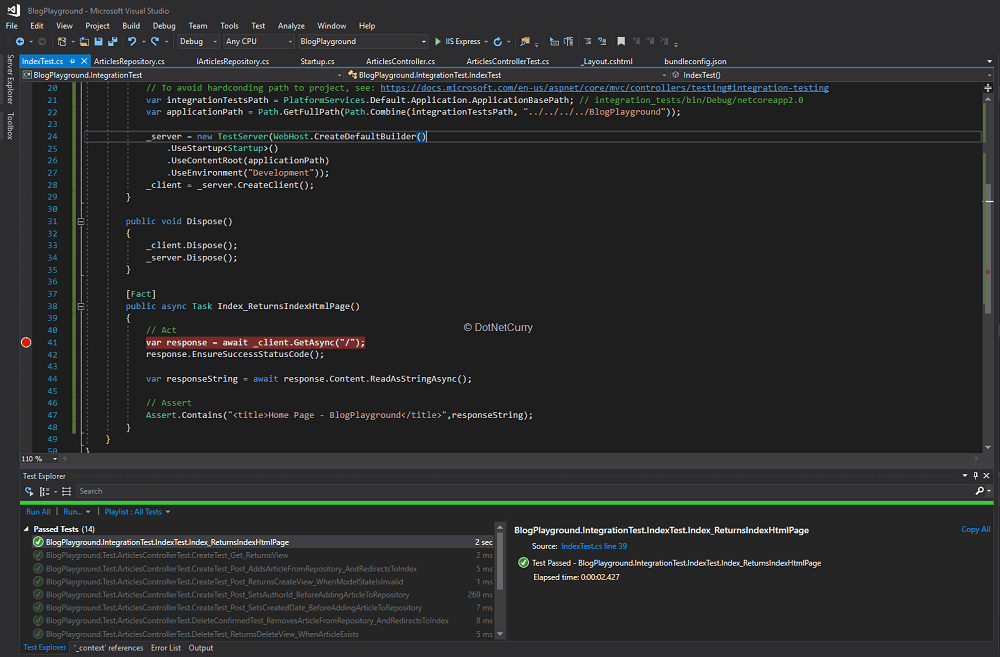
Once you are done with these changes, you can go ahead and run the test again. You should see your first integration test passing.

Figure 2, running the first integration test
Dealing with the Database used by Entity Framework
We have our first integration test that verifies that our app can be started and responds to the home endpoint by rendering the index html page. However, if we were to write tests for the Article endpoints, our Entity Framework dbContext would be using a real SQL Server DB in the same way as when we start the application.
This will make it harder for us to make certain that no state is shared between tests and to ensure the database is in the right state before starting each test. If only we had a quick and easy way of starting a database for each test and drop it afterwards!
Luckily for us, when using Entity Framework, there is now an option to use an in-memory database that can be easily started and removed in each test (and seeded with data as we will later see).
Right now, the ConfigureServices of your Startup class looks like this:
services.AddDbContext<ApplicationDbContext>(options =>
    options.UseSqlServer(Configuration.GetConnectionString("DefaultConnection")));
Replacing a real SQL server connection for your Entity Framework context with an in-memory database is as simple as replacing the lines above with:
services.AddDbContext<ApplicationDbContext>(options =>
    options.UseInMemoryDatabase("blogplayground_test_db"));
However, we don’t want to permanently change our application, we just want to replace the database initialization for our tests without affecting the normal startup of the application. We can then move the initialization code to a virtual method in the Startup class:
public void ConfigureServices(IServiceCollection services)
{
    ConfigureDatabase(services);
    // Same configuration as before except for services.AddDbContext
    …
}

public virtual void ConfigureDatabase(IServiceCollection services)
{
    services.AddDbContext<ApplicationDbContext>(options =>
        options.UseSqlServer(Configuration.GetConnectionString("DefaultConnection")));
}
Then create a new subclass TestStartup in the IntegrationTest project where we override that method by setting an in-memory database:
public class TestStartup : Startup
{
    public TestStartup(IConfiguration configuration) : base(configuration)
    {
    }

    public override void ConfigureDatabase(IServiceCollection services)
    {
        services.AddDbContext<ApplicationDbContext>(options =>
            options.UseInMemoryDatabase("blogplayground_test_db"));

    }
}
Finally change your IndexTest class to use the new startup class:
_server = new TestServer(WebHost.CreateDefaultBuilder()
    .UseStartup<TestStartup>()
    .UseContentRoot(applicationPath)
    .UseEnvironment("Development"));
_client = _server.CreateClient();
Now our integration test will always use the in-memory database provided by Entity Framework Core which we can safely recreate on every test.
Note: As per the official docs, the in-memory database is not a full relational database and some features won’t be available like checking for referential integrity constraints when saving new records.
If you hit those limitations and still want to use an in-memory database with your integration tests, you can try the in-memory mode of SQLite. If you do so, be aware you will need to manually open the SQL connection and make sure you don’t close it until the end of the test. Check the official docs for further info.
Seeding the database with predefined users and blog posts
So far, we have an integration test using an in-memory database that is recreated for each test. It would be interesting to seed that database with some predefined data that will be then available in any test.
We can add another hook to the Startup class by making its Configure method virtual, so we can override it in the TestStartup class. We will then just need to add the database seed code to the overridden method.
Let’s start by creating a new folder named Data inside the integration test and add a new file PredefinedData.cs where we will define the predefined articles and profiles for our tests:
public static class PredefinedData
{
    public static string Password = @"!Covfefe123";

    public static ApplicationUser[] Profiles = new[] {
        new ApplicationUser { Email = "tester@test.com", UserName = " tester@test.com", FullName = "Tester" },
        new ApplicationUser { Email = "author@test.com", UserName = " author@test.com", FullName = "Tester" }
    };

    public static Article[] Articles = new[] {
        new Article { ArticleId = 111, Title = "Test Article 1", Abstract = "Abstract 1", Contents = "Contents 1", CreatedDate = DateTime.Now.Subtract(TimeSpan.FromMinutes(60)) },
        new Article { ArticleId = 222, Title = "Test Article 2", Abstract = "Abstract 2", Contents = "Contents 2", CreatedDate = DateTime.Now }
    };
}
Next let’s add a new class named DatabaseSeeder inside the same folder. This is where we will add the EF code that actually inserts the predefined data into the database:
public class DatabaseSeeder
{
    private readonly UserManager<ApplicationUser> _userManager;
    private readonly ApplicationDbContext _context;

    public DatabaseSeeder(ApplicationDbContext context, UserManager<ApplicationUser> userManager)
    {
        _context = context;
        _userManager = userManager;
    }

    public async Task Seed()
    {
        // Add all the predefined profiles using the predefined password
        foreach (var profile in PredefinedData.Profiles)
        {
            await _userManager.CreateAsync(profile, PredefinedData.Password);
            // Set the AuthorId navigation property
            if (profile.Email == "author@test.com")
            {
                PredefinedData.Articles.ToList().ForEach(a => a.AuthorId = profile.Id);
            }
        }

        // Add all the predefined articles
        _context.Article.AddRange(PredefinedData.Articles);
        _context.SaveChanges();
    }
}
Finally, let’s make Startup.Configure a virtual method that we can override in TestStartup with the following definition:
public override void ConfigureDatabase(IServiceCollection services)
{
    // Replace default database connection with In-Memory database
    services.AddDbContext<ApplicationDbContext>(options =>
        options.UseInMemoryDatabase("blogplayground_test_db"));

    // Register the database seeder
    services.AddTransient<DatabaseSeeder>();

}

public override void Configure(IApplicationBuilder app, IHostingEnvironment env, ILoggerFactory loggerFactory)
{
    // Perform all the configuration in the base class
    base.Configure(app, env, loggerFactory);

    // Now seed the database
    using (var serviceScope = app.ApplicationServices.GetRequiredService<IServiceScopeFactory>().CreateScope())
    {
        var seeder = serviceScope.ServiceProvider.GetService<DatabaseSeeder>();
        seeder.Seed();
    }
}
With these changes, we are now ready to start writing tests that exercise the Article endpoints.
Writing tests using the preloaded in-memory database
Let’s start by adding a new integration test that will call the Article Index route. Since the controller returns a view, and the way things are right now, it would be hard to ensure the returned html contains every article from the database.
We could add a data attribute to every article list item that gets rendered on the index view, so that in our test, we can verify if the response gets a success code and an html string that contains a data-articleid attribute for every predefined article.
Update Views/Articles/Index.cshtml so that the list of articles is rendered as:
<ul class="col-md-8 list-unstyled article-list">
@foreach (var article in Model)
{
    <li data-articleid="@article.ArticleId">
        @Html.Partial("_ArticleSummary", article)
    </li>
}
</ul>
Now we can simply add another integration test class to our project with the following test:
public class ArticlesTest
{
    private readonly TestServer _server;
    private readonly HttpClient _client;

    public ArticlesTest()
    {
        var integrationTestsPath = PlatformServices.Default.Application.ApplicationBasePath;
        var applicationPath = Path.GetFullPath(Path.Combine(integrationTestsPath, "../../../../BlogPlayground"));

        _server = new TestServer(WebHost.CreateDefaultBuilder()
            .UseStartup<TestStartup>()
            .UseContentRoot(applicationPath)
            .UseEnvironment("Development"));
        _client = _server.CreateClient();
    }

    public void Dispose()
    {
        _client.Dispose();
        _server.Dispose();
    }

    [Fact]
    public async Task Index_Get_ReturnsIndexHtmlPage_ListingEveryArticle()
    {
        // Act
        var response = await _client.GetAsync("/Articles");

        // Assert
        response.EnsureSuccessStatusCode();
        var responseString = await response.Content.ReadAsStringAsync();
        foreach (var article in PredefinedData.Articles)
        {
            Assert.Contains($"<li data-articleid=\"{ article.ArticleId }\">", responseString);
        }
    }
}
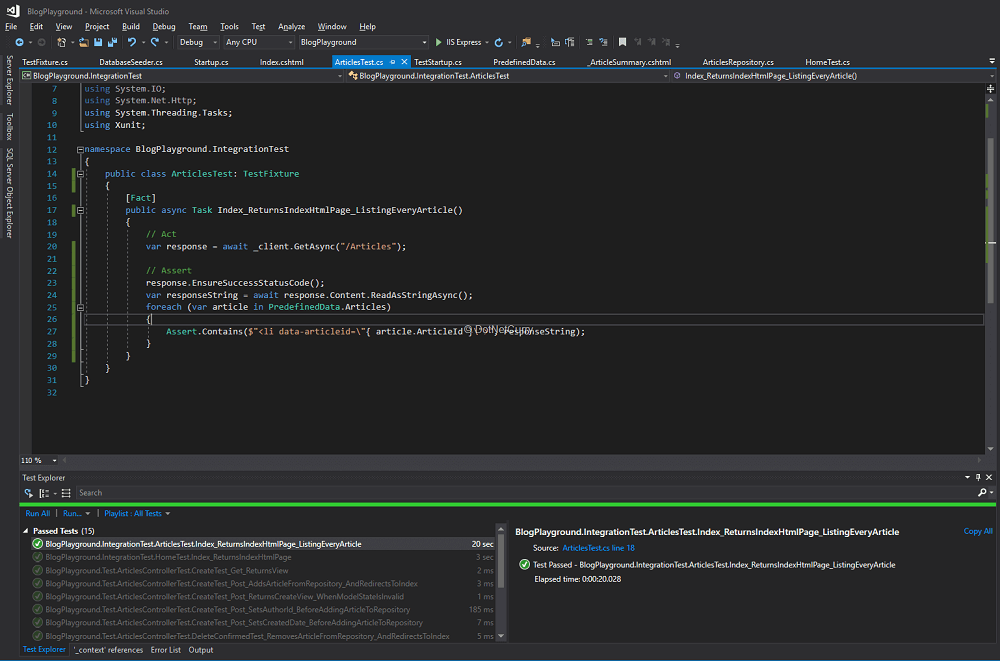
Run the test and you should see a reassuring green result!

Figure 3, Running the articles index test
Before we move on and try to write tests for the POST/DELETE routes, let’s refactor our integration tests slightly since we are currently repeating the initialization and cleanup code on both HomeTest and ArticlesTest. We could create the classic base TestFixture class:
public class TestFixture: IDisposable
{
    protected readonly TestServer _server;
    protected readonly HttpClient _client;

    public TestFixture()
    {
        var integrationTestsPath = PlatformServices.Default.Application.ApplicationBasePath;
        var applicationPath = Path.GetFullPath(Path.Combine(integrationTestsPath, "../../../../BlogPlayground"));

        _server = new TestServer(WebHost.CreateDefaultBuilder()
            .UseStartup<TestStartup>()
            .UseContentRoot(applicationPath)
            .UseEnvironment("Development"));
        _client = _server.CreateClient();
    }

    public void Dispose()
    {
        _client.Dispose();
        _server.Dispose();
    }
}
Then update the tests to inherit from it:
public class ArticlesTest: TestFixture
{
    [Fact]
    public async Task Index_Get_ReturnsIndexHtmlPage_ListingEveryArticle()
    {
        // Act
        var response = await _client.GetAsync("/Articles");

        // Assert
        response.EnsureSuccessStatusCode();
        var responseString = await response.Content.ReadAsStringAsync();
        foreach (var article in PredefinedData.Articles)
        {
            Assert.Contains($"<li data-articleid=\"{ article.ArticleId }\">", responseString);
        }
    }
}
Now we are ready to tackle the problems we need to solve in order to write integration tests for the methods that require an anti-forgery token and an authenticated user. Otherwise you won’t be able to send a POST request to create or delete articles since those routes are decorated with the [Authorize] and [ValidateAntiForgeryToken] attributes.
Dealing with Authentication and Anti-Forgery
Our next target is the POST Create method. We should be able to write a similar test like the previous one where we POST an url-encoded form with the new article properties as in:
[Fact]
public async Task Create_Post_RedirectsToList_AfterCreatingArticle()
{
    // Arrange
    var formData = new Dictionary<string, string>
    {
        { "Title", "mock title" },
        { "Abstract", "mock abstract" },
        { "Contents", "mock contents" }
    };

    // Act
    var response = await _client.PostAsync("/Articles/Create", new FormUrlEncodedContent(formData));

    // Assert
    Assert.Equal(HttpStatusCode.Found, response.StatusCode);
    Assert.Equal("/Articles", response.Headers.Location.ToString());
}
This piece of code might be enough in some situations.
However, since we are using the [ValidateAntiForgeryToken] and [Authorize] attributes, the request above won’t succeed until we are able to include the following within the request:
There are several strategies you can follow to allow that test to succeed. The one I have implemented involves sending these requests:
- a GET request to /Account/Login in order to extract the anti-forgery cookie and token from the response
- followed by POST request to the /Account/Login using one of the predefined profiles, extracting the authentication cookie from the response
Once the required authentication and anti-forgery data is extracted, we can include them within any subsequent request we send in our tests.
Let’s start by extracting the anti-forgery cookie and token using new utility methods added to the base TestFixture class. The following code uses the default values of the anti-forgery cookie and token form field. If you have changed them in your Startup class with services.AddAntiforgery(opts => … ) you will need to make sure you use the right names here:
protected SetCookieHeaderValue _antiforgeryCookie;
protected string _antiforgeryToken;

protected static Regex AntiforgeryFormFieldRegex = new Regex(@"\<input name=""__RequestVerificationToken"" type=""hidden"" value=""([^""]+)"" \/\>");

protected async Task<string> EnsureAntiforgeryToken()
{
    if (_antiforgeryToken != null) return _antiforgeryToken;

    var response = await _client.GetAsync("/Account/Login");
    response.EnsureSuccessStatusCode();
    if (response.Headers.TryGetValues("Set-Cookie", out IEnumerable<string> values))
    {
        _antiforgeryCookie = SetCookieHeaderValue.ParseList(values.ToList()).SingleOrDefault(c => c.Name.StartsWith(".AspNetCore.AntiForgery.", StringComparison.InvariantCultureIgnoreCase));
    }
    Assert.NotNull(_antiforgeryCookie);
    _client.DefaultRequestHeaders.Add("Cookie", new CookieHeaderValue(_antiforgeryCookie.Name, _antiforgeryCookie.Value).ToString());

    var responseHtml = await response.Content.ReadAsStringAsync();
    var match = AntiforgeryFormFieldRegex.Match(responseHtml);
    _antiforgeryToken = match.Success ? match.Groups[1].Captures[0].Value : null;
    Assert.NotNull(_antiforgeryToken);

    return _antiforgeryToken;
}
This code simply sends a GET request to /Account/Login and then extracts both the anti-forgery cookie from the response headers and the token embedded as a form field in the response html.
Notice how we call _client.DefaultRequestHeaders.Add(…) so that the anti-forgery cookie is automatically added on any subsequent requests (The token would need to be manually added as part of any url-encoded form data to be posted).
Now we can write a similar utility method to ensure we login with a predefined user and capture the authentication cookie from the response. We will need to use the previous method in order to include the anti-forgery cookie and token with the request, since the AccountController also uses the [ValidateAntiForgery] attribute.
protected SetCookieHeaderValue _authenticationCookie;

protected async Task<Dictionary<string, string>> EnsureAntiforgeryTokenForm(Dictionary<string, string> formData = null)
{
    if (formData == null) formData = new Dictionary<string, string>();

    formData.Add("__RequestVerificationToken", await EnsureAntiforgeryToken());
    return formData;
}

public async Task EnsureAuthenticationCookie()
{
    if (_authenticationCookie != null) return;

    var formData = await EnsureAntiforgeryTokenForm(new Dictionary<string, string>
    {
        { "Email", PredefinedData.Profiles[0].Email },
        { "Password", PredefinedData.Password }
    });
    var response = await _client.PostAsync("/Account/Login", new FormUrlEncodedContent(formData));
    Assert.Equal(HttpStatusCode.Redirect, response.StatusCode);

    if (response.Headers.TryGetValues("Set-Cookie", out IEnumerable<string> values))
    {
        _authenticationCookie = SetCookieHeaderValue.ParseList(values.ToList()).SingleOrDefault(c => c.Name.StartsWith(AUTHENTICATION_COOKIE, StringComparison.InvariantCultureIgnoreCase));
    }
    Assert.NotNull(_authenticationCookie);
    _client.DefaultRequestHeaders.Add("Cookie", new CookieHeaderValue(_authenticationCookie.Name, _authenticationCookie.Value).ToString());

    // The current pair of antiforgery cookie-token is not valid anymore
    // Since the tokens are generated based on the authenticated user!
    // We need a new token after authentication (The cookie can stay the same)
    _antiforgeryToken = null;
}
The code is very similar, except for the fact that we send a POST request with an url-encoded form as the contents. The form contains the username and password of one of the predefined profiles seeded by our DatabaseSeeder and the anti-forgery token retrieved with the previous utility.
An important point to note is that anti-forgery tokens are valid for the currently authenticated user. So, after authenticating that the previous token is no longer valid, we would need to get a fresh token as part of test methods.
Now that we have the right tooling in place, we can ensure the intended test for sending a POST request to /Articles/Create passes:
[Fact]
public async Task Create_Post_RedirectsToList_AfterCreatingArticle()
{
    // Arrange
    await EnsureAuthenticationCookie();
    var formData = await EnsureAntiforgeryTokenForm(new Dictionary<string, string>
    {
        { "Title", "mock title" },
        { "Abstract", "mock abstract" },
        { "Contents", "mock contents" }
    });

    // Act
    var response = await _client.PostAsync("/Articles/Create", new FormUrlEncodedContent(formData));

    // Assert
    Assert.Equal(HttpStatusCode.Found, response.StatusCode);
    Assert.Equal("/Articles", response.Headers.Location.ToString());
}
Notice how the test includes both await EnsureAuthenticationToken() and await EnsureAntiforgeryTokenForm() in order to include the required data within the request.
Armed with these tools, it would be easy to keep testing the other endpoints provided by the controller, like the DeleteConfirmation:
[Fact]
public async Task DeleteConfirmation_RedirectsToList_AfterDeletingArticle()
{
    // Arrange
    await EnsureAuthenticationCookie();
    var formData = await EnsureAntiforgeryTokenForm();

    // Act
    var response = await _client.PostAsync($"/Articles/Delete/{PredefinedData.Articles[0].ArticleId}", new FormUrlEncodedContent(formData));

    // Assert
    Assert.Equal(HttpStatusCode.Found, response.StatusCode);
    Assert.Equal("/Articles", response.Headers.Location.ToString());
}

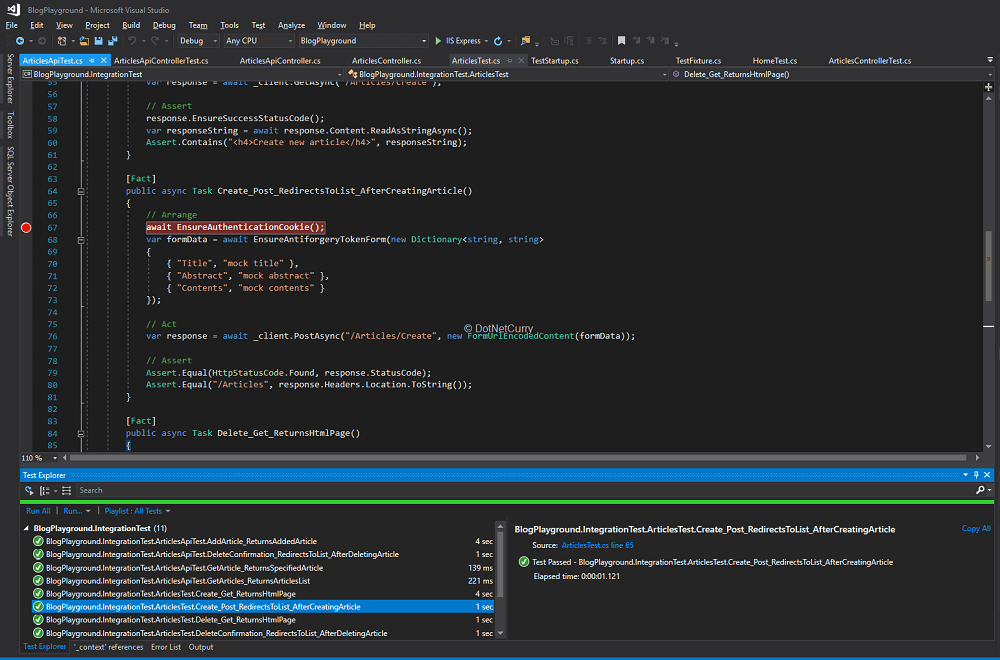
Figure 4, running the integration test with authentication and anti-forgery
You can try and include additional coverage before we move on to the API controller. Check the GitHub repo if you need to.
Testing API controllers
Before we finish with the integration test, let’s for a second also consider the API controller we introduced in the previous article (on Page {}). It provides a similar functionality in the shape of a REST API that sends and receives JSONs.
There are two main differences with the earlier tests:
- We need to setup anti-forgery to also consider reading the token from a header, since we won’t be posting url-encoded forms. We will then post a JSON with an article and include a separate header with the anti-forgery token.
- We will need to use Newtonsoft.Json in order to serialize/deserialize the request and response contents to/from JSON objects.
Let’s deal with anti-forgery first. In your startup class, include the following line before the call to AddMvc:
services.AddAntiforgery(opts => opts.HeaderName = "XSRF-TOKEN");
We just need another utility in our fixture class that sets the token in the expected header:
public async Task EnsureAntiforgeryTokenHeader()
{
    _client.DefaultRequestHeaders.Add(
        "XSRF-TOKEN",
        await EnsureAntiforgeryToken()
    );
}
We can then write a test that uses Newtonsoft.Json’s JsonConverter to serialize/deserialize an Article into/to JSON. The test for the create method would look like this:
[Fact]
public async Task AddArticle_ReturnsAddedArticle()
{
    // Arrange
    await EnsureAuthenticationCookie();
    await EnsureAntiforgeryTokenHeader();
    var article = new Article { Title = "mock title", Abstract = "mock abstract", Contents = "mock contents" };

    // Act
    var contents = new StringContent(JsonConvert.SerializeObject(article), Encoding.UTF8, "application/json");
    var response = await _client.PostAsync("/api/articles", contents);

    // Assert
    response.EnsureSuccessStatusCode();
    var responseString = await response.Content.ReadAsStringAsync();
    var addedArticle = JsonConvert.DeserializeObject<Article>(responseString);
    Assert.True(addedArticle.ArticleId > 0, "Expected added article to have a valid id");
}
Notice how we can serialise the Article we want to add into a StringContent instance with:
new StringContent(JsonConvert.SerializeObject(article), Encoding.UTF8, "application/json");
Similarly, we deserialize the response into an Article with:
var addedArticle = JsonConvert.DeserializeObject<Article>(responseString);
Testing the additional methods provided by the API controller should be straightforward now that we know how to deal with JSON, authentication cookies and anti-forgery tokens!
Conclusion
We have seen how Integration Tests complement Unit Tests by including additional parts of the system like database access or security in the test, while still running in a controlled environment.
These tests are really valuable, even more so than unit tests in applications with very little or very simple logic. If all your app does is provide simple CRUD APIs with little extra logic, you will be investing your time better in adding integration tests, while reserving unit tests for specific areas with logic that might benefit from them.
However, similar to Unit Tests; Integration tests aren’t free either!
They are harder to setup when compared to unit tests, require some significant upfront time to deal with specific features of your application like security, and are considerably slower than unit tests.
Make sure you have the right proportion of unit vs integration tests in your project, maximizing useful coverage against the writing and maintenance cost of each test!
It is also worth highlighting that we are still leaving some pieces of the application out. For instance, the database wasn’t a real database, it was an in-memory replacement so we could easily setup and tear it down in every test.
Similarly, the tests send requests in a headless mode without a browser, even though we are building a web application whose client side would end up running in a browser. This means we are not done yet and we need to consider even higher-level tests.
The next upcoming article will look at end–to-end tests, where we can ensure a real deployed system is working as expected.
Also Read: End-to-End Testing for ASP.NET Core Applications
This article was technically reviewed by Damir Arh.
This article has been editorially reviewed by Suprotim Agarwal.
C# and .NET have been around for a very long time, but their constant growth means there’s always more to learn.
We at DotNetCurry are very excited to announce The Absolutely Awesome Book on C# and .NET. This is a 500 pages concise technical eBook available in PDF, ePub (iPad), and Mobi (Kindle).
Organized around concepts, this Book aims to provide a concise, yet solid foundation in C# and .NET, covering C# 6.0, C# 7.0 and .NET Core, with chapters on the latest .NET Core 3.0, .NET Standard and C# 8.0 (final release) too. Use these concepts to deepen your existing knowledge of C# and .NET, to have a solid grasp of the latest in C# and .NET OR to crack your next .NET Interview.
Click here to Explore the Table of Contents or Download Sample Chapters!
Was this article worth reading? Share it with fellow developers too. Thanks!
Daniel Jimenez Garciais a passionate software developer with 10+ years of experience who likes to share his knowledge and has been publishing articles since 2016. He started his career as a Microsoft developer focused mainly on .NET, C# and SQL Server. In the latter half of his career he worked on a broader set of technologies and platforms with a special interest for .NET Core, Node.js, Vue, Python, Docker and Kubernetes. You can
check out his repos.